
More actions
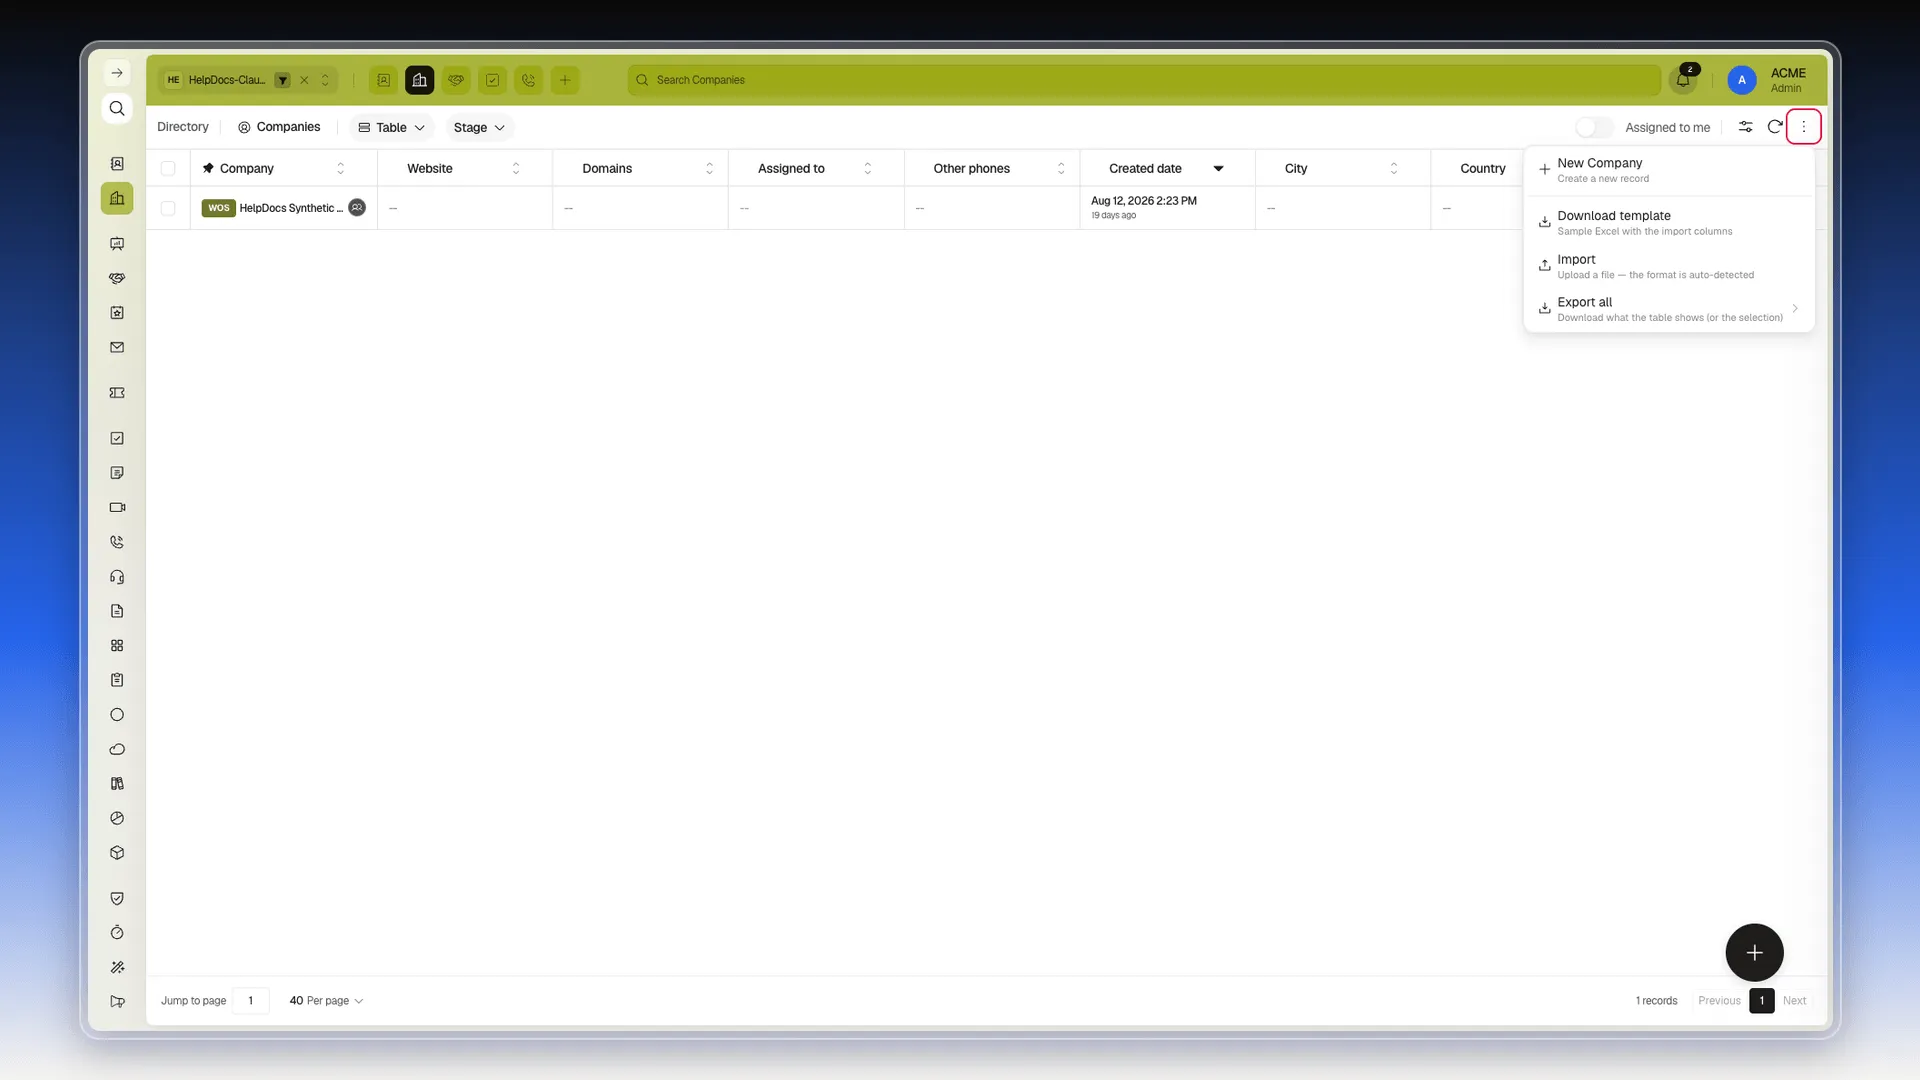
The More actions menu is the three-dot button next to Refresh. It gathers the creation and data-exchange actions for the table you have open.
Open the menu
Section titled “Open the menu”- Enter the module you want to manage.
- Select More actions beside Refresh.
- Choose the action you need.
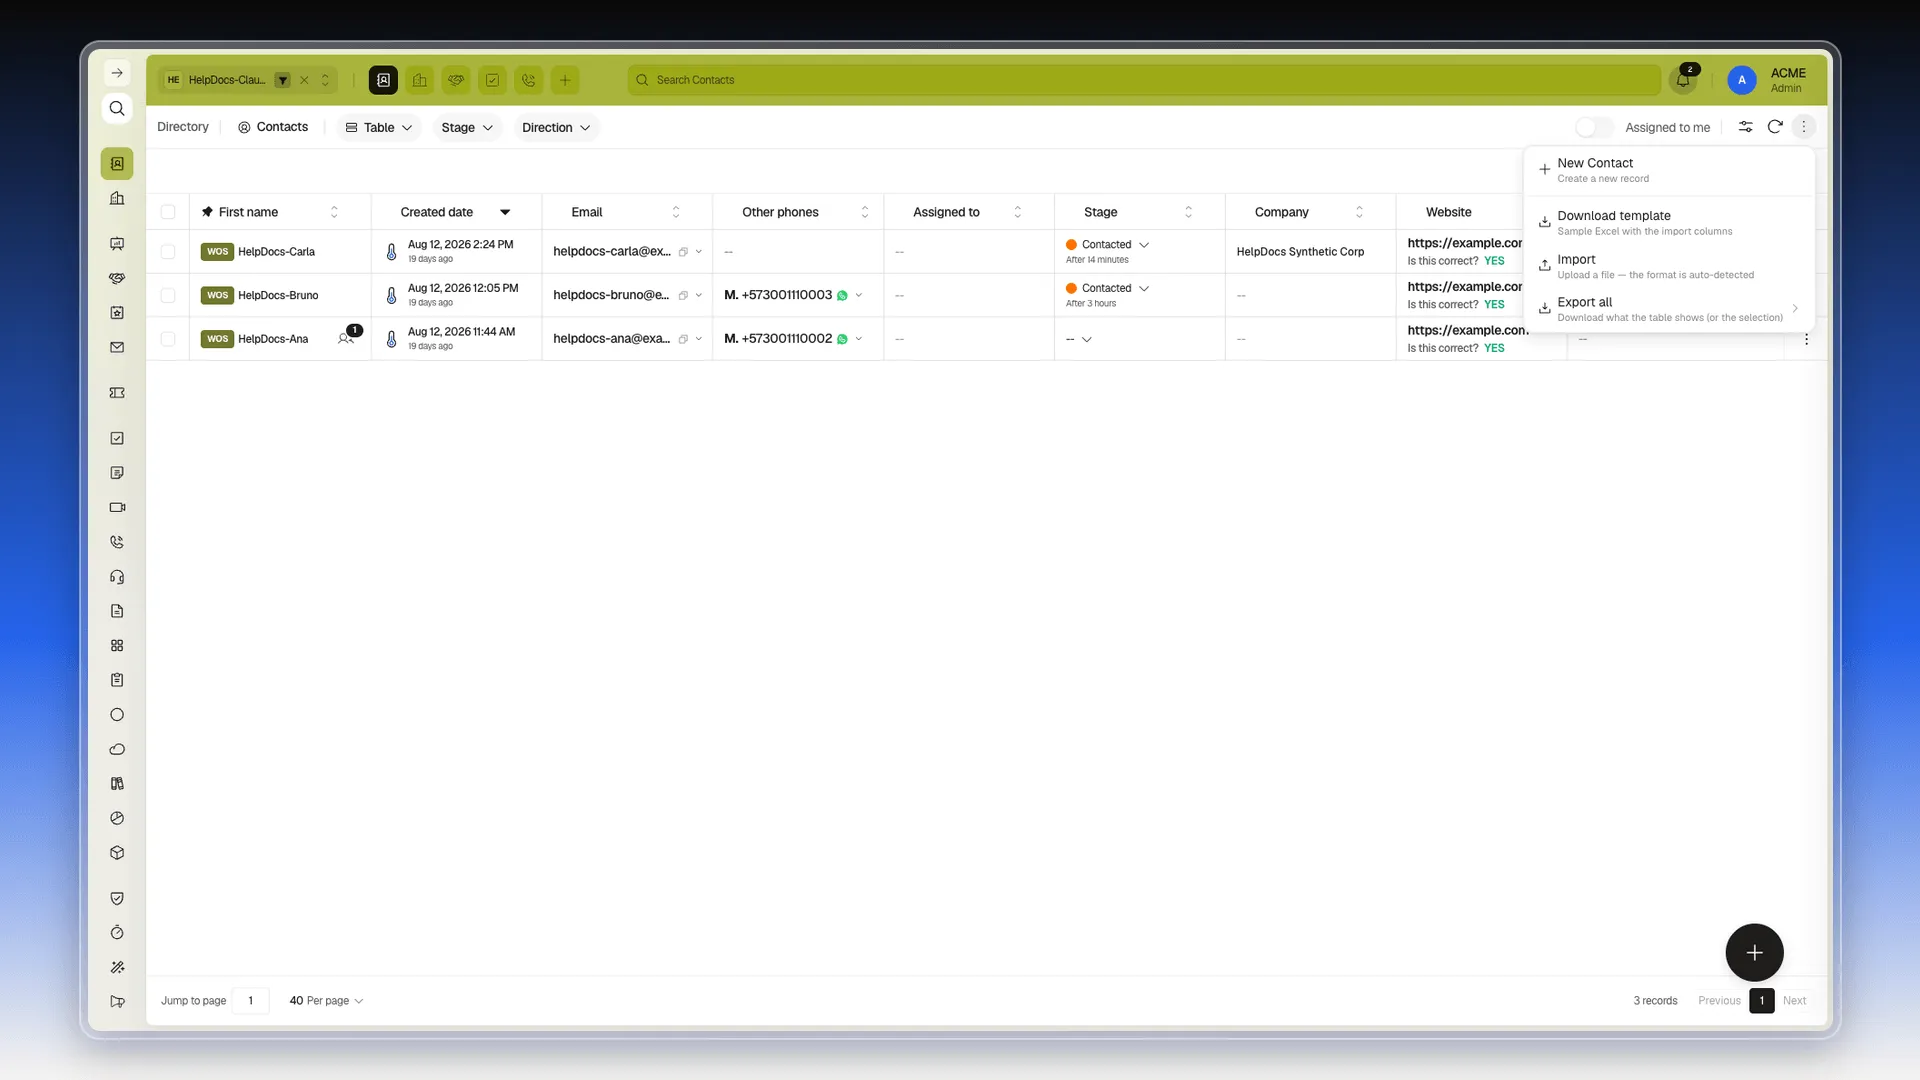
The same structure appears in Contacts; only the record name you can create changes.
Create a record
Section titled “Create a record”New [record]
Section titled “New [record]”Select New [record] to open the creation form for the current module. Its name changes with the table: New Contact, New Company, New Task, and New Ticket were verified. Complete the form and save the record from that panel.
Prepare and import data
Section titled “Prepare and import data”Download template
Section titled “Download template”Select Download template to download an example Excel file with the columns expected by the current module’s import. Use it as the starting point for your data: keep its headings and do not add fields the template does not include.
Import
Section titled “Import”Select Import to upload a file. The interface says that it detects the format automatically. Review the column mapping and any validation before confirming the import; the fields and requirements depend on the module. The specific case for Contacts is in Import contacts.
Export data
Section titled “Export data”Export all
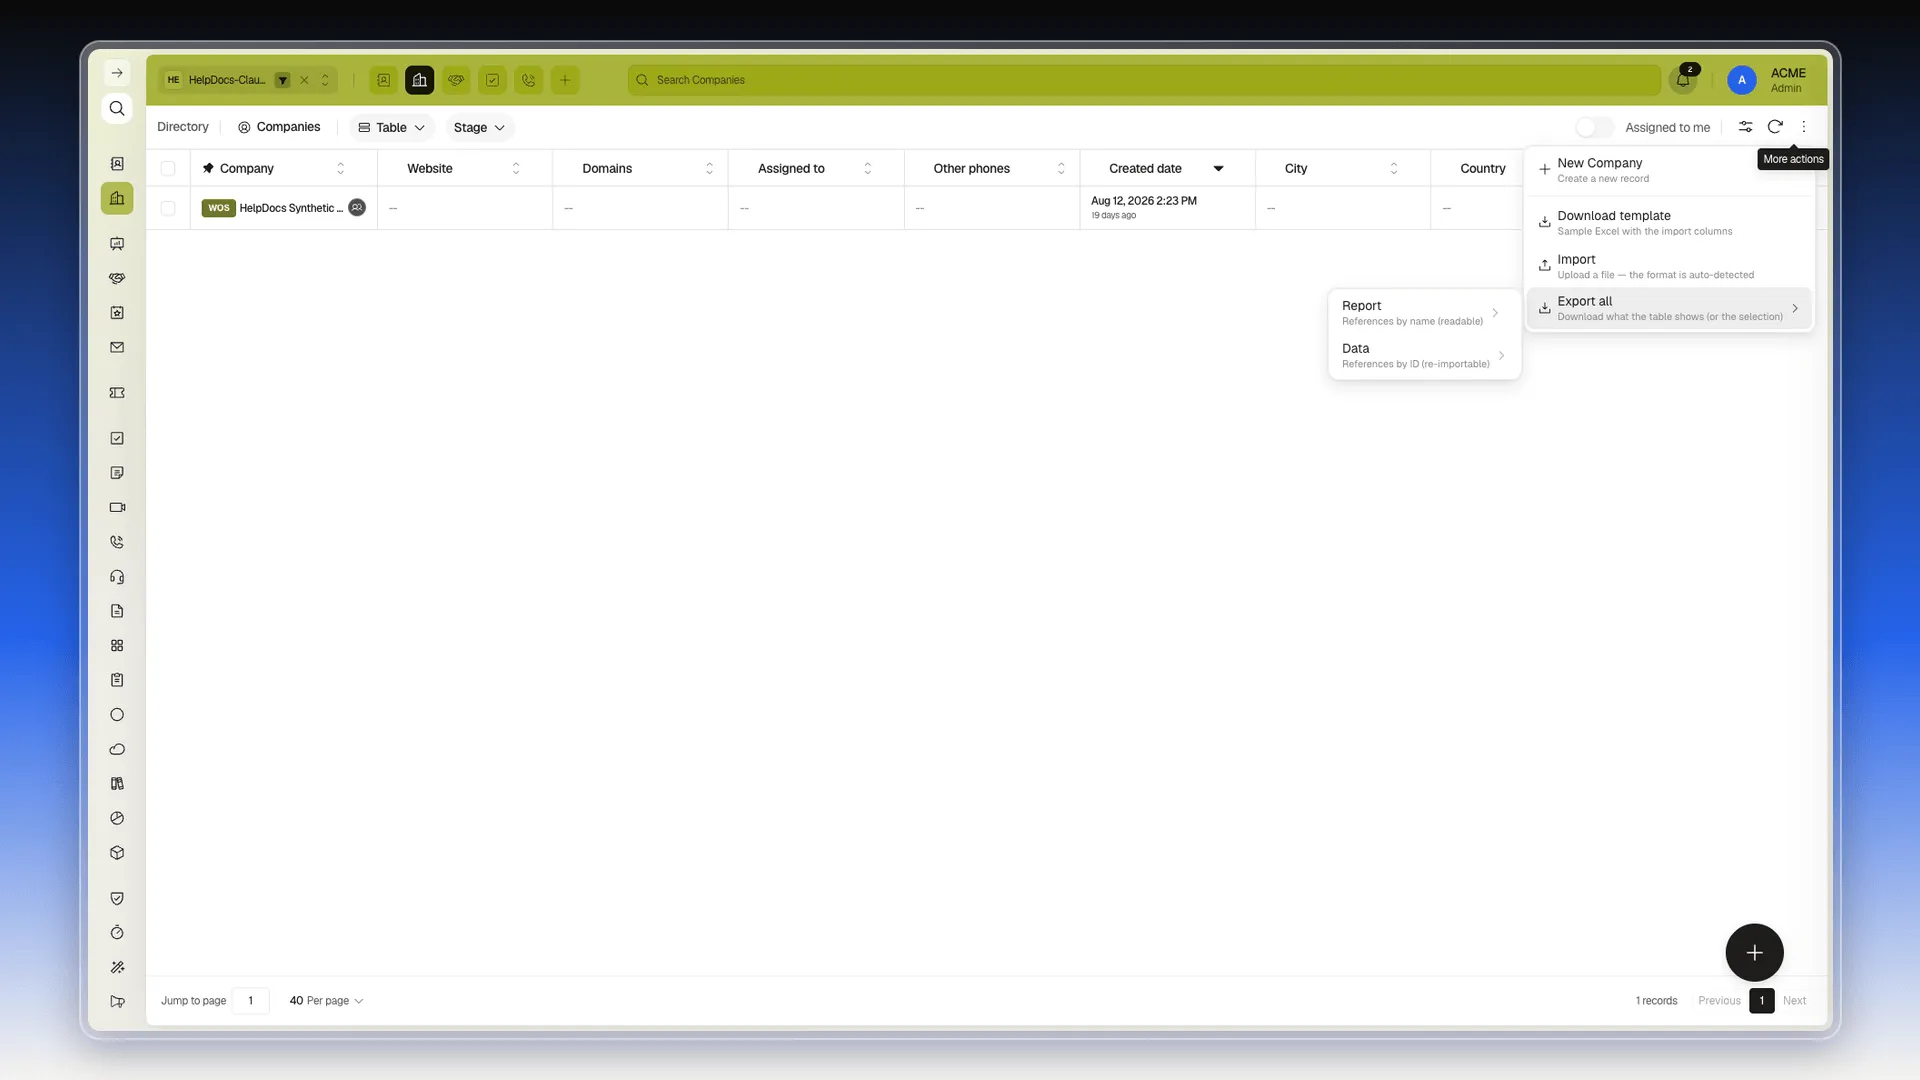
Section titled “Export all”Select Export all to download what the table displays. When records are selected, the menu indicates that it exports the table or the selection, as appropriate. Then choose the content type and file format. For Contacts, see Export results.
Report
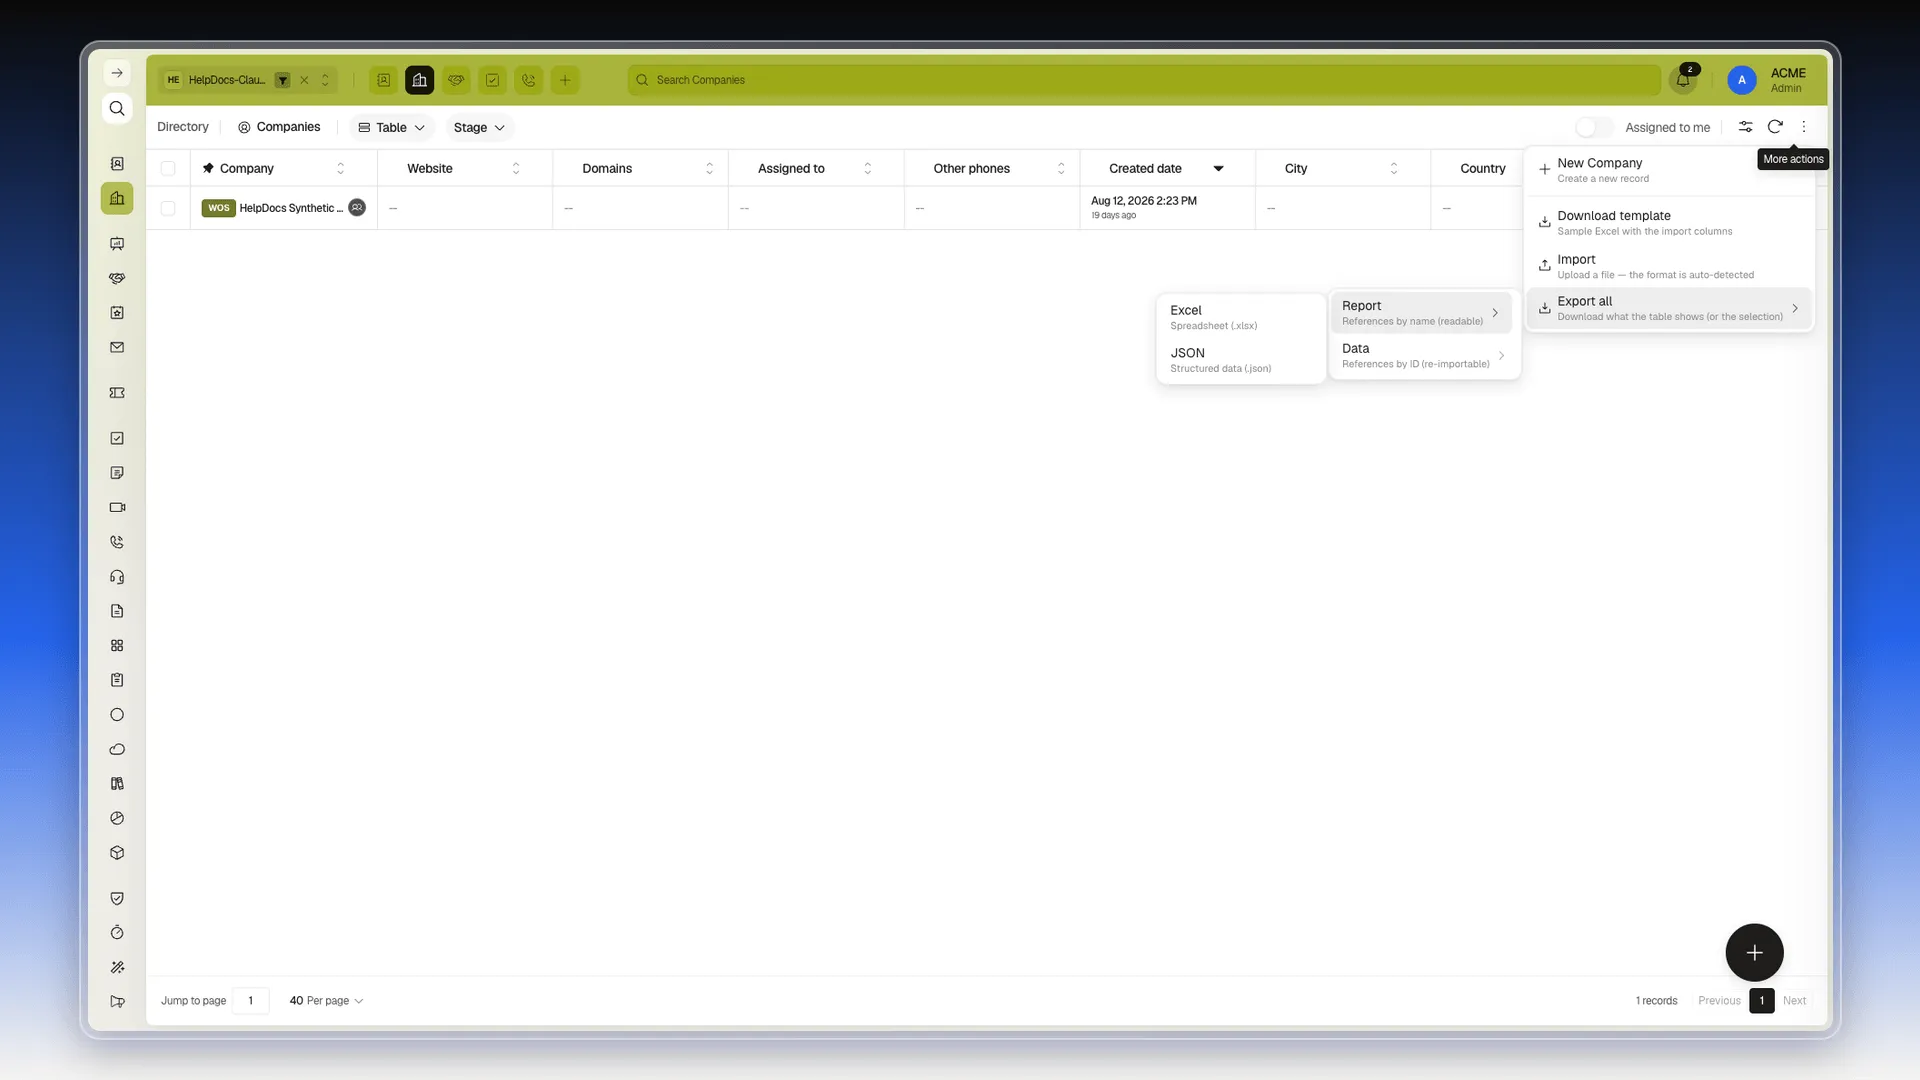
Section titled “Report”Select Report when you need a readable file: its references use each record’s visible name. Then choose Excel to download an .xlsx spreadsheet or JSON to download structured .json data.
Select Data when you need to keep ID-based references, for example to prepare a reimport or integrate the information with another system. Then choose Excel (.xlsx) or JSON (.json).
Module variants
Section titled “Module variants”The same menu was verified in Contacts, Companies, Tasks, and Tickets. In all four, it showed these actions in this order:
- New [record]
- Download template
- Import
- Export all
The first label adapts to the module. The template, import, and export descriptions remain the same, while the columns, validation, and downloaded data always belong to the open table.
If you cannot see the action you need
Section titled “If you cannot see the action you need”Open the menu from the correct module table and check its name before preparing a file. The interface only shows actions available for that table, so a Contacts template or export does not replace the one for Companies, Tasks, or Tickets.
🎥 Video coming soon.
Frequently asked questions
It is in the three dots next to Refresh in the current table.
Not necessarily. The menu shows the actions available for the table you have open.
Was this article helpful?
Thanks for your feedback!