
Notifications
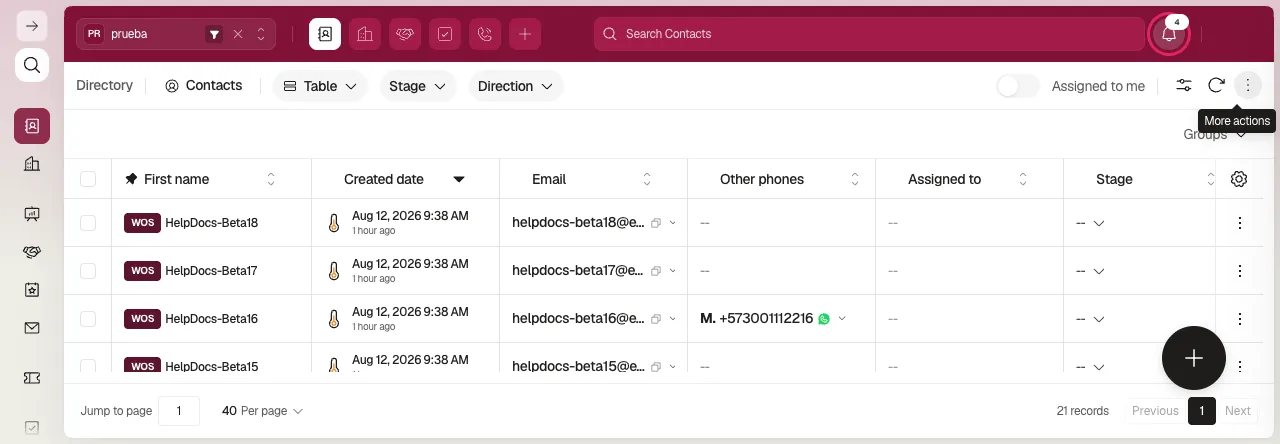
The inbox gathers notifications that need your attention. Its number indicator shows how many are pending.
Review a notification
Section titled “Review a notification”- Select Inbox on the bottom bar. In the desktop view, you can also use the bell icon.
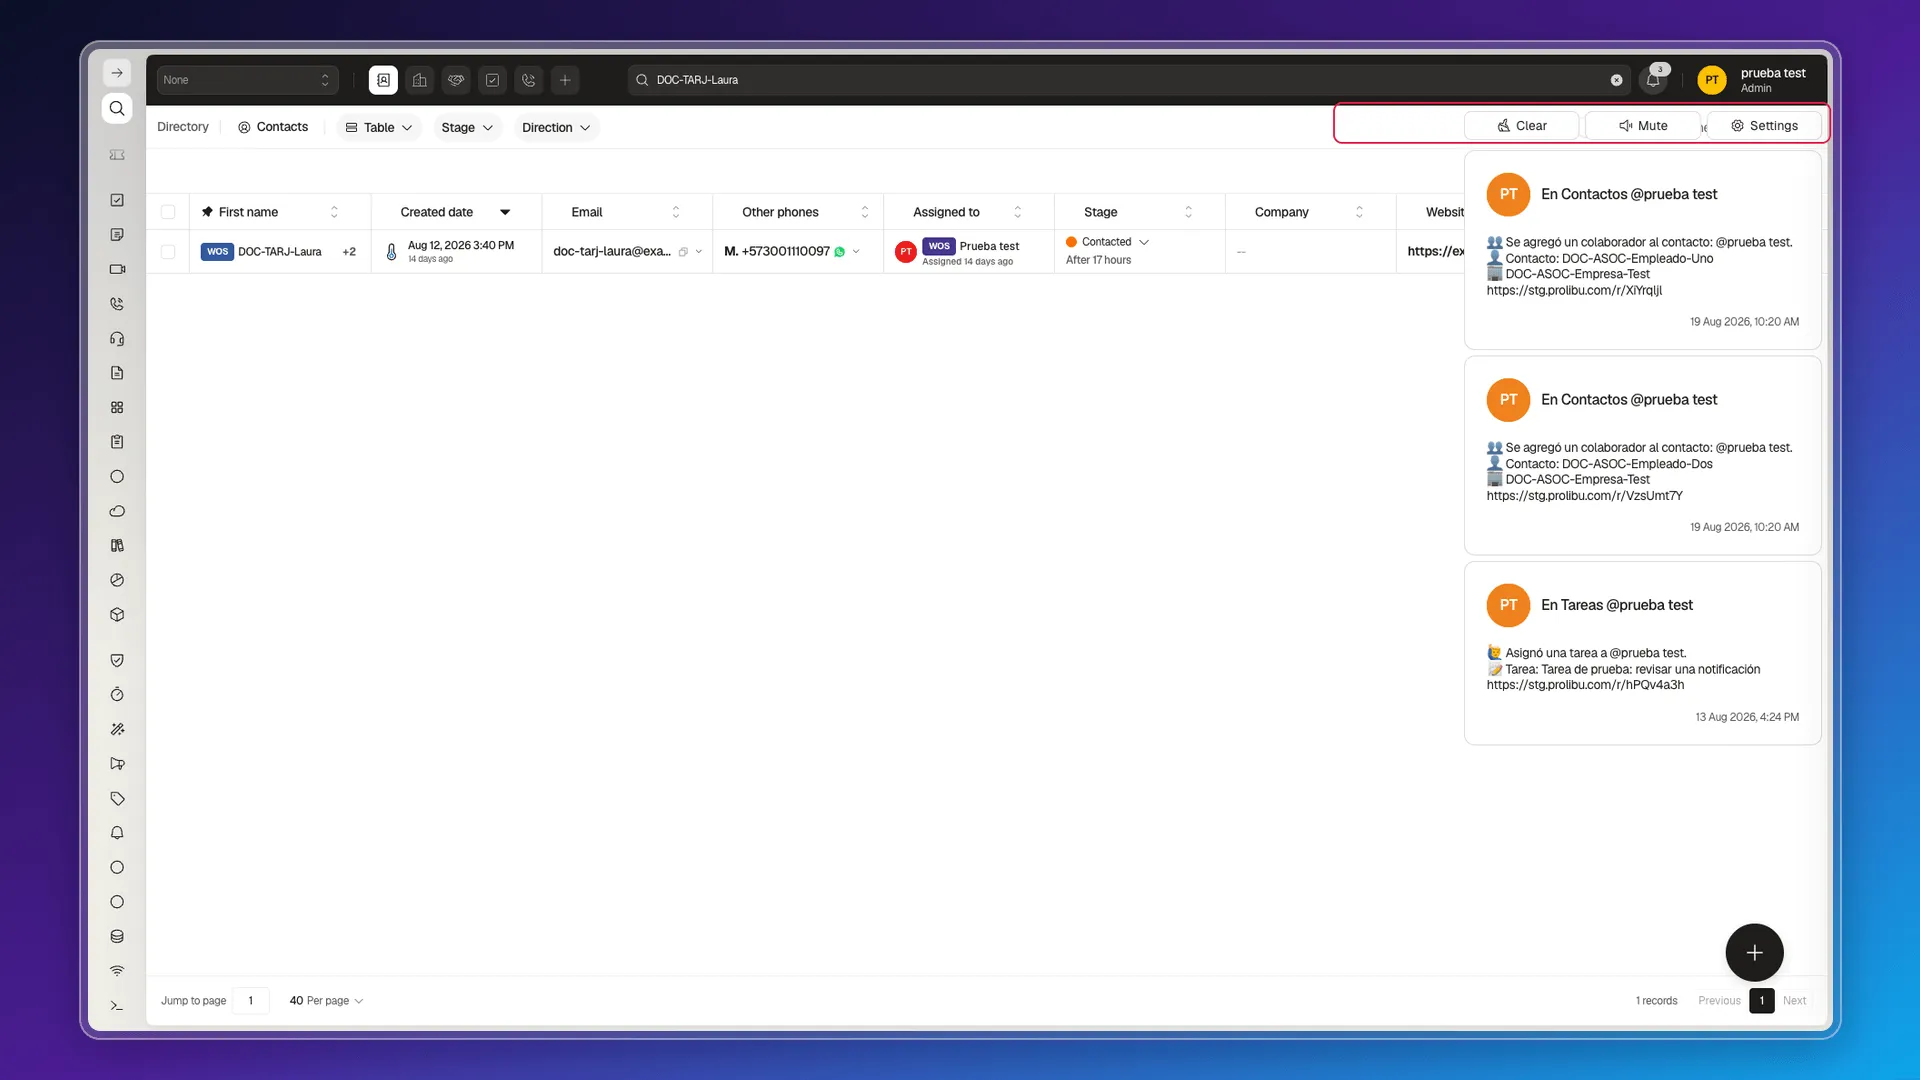
- Read the title, message, and date for each notification.
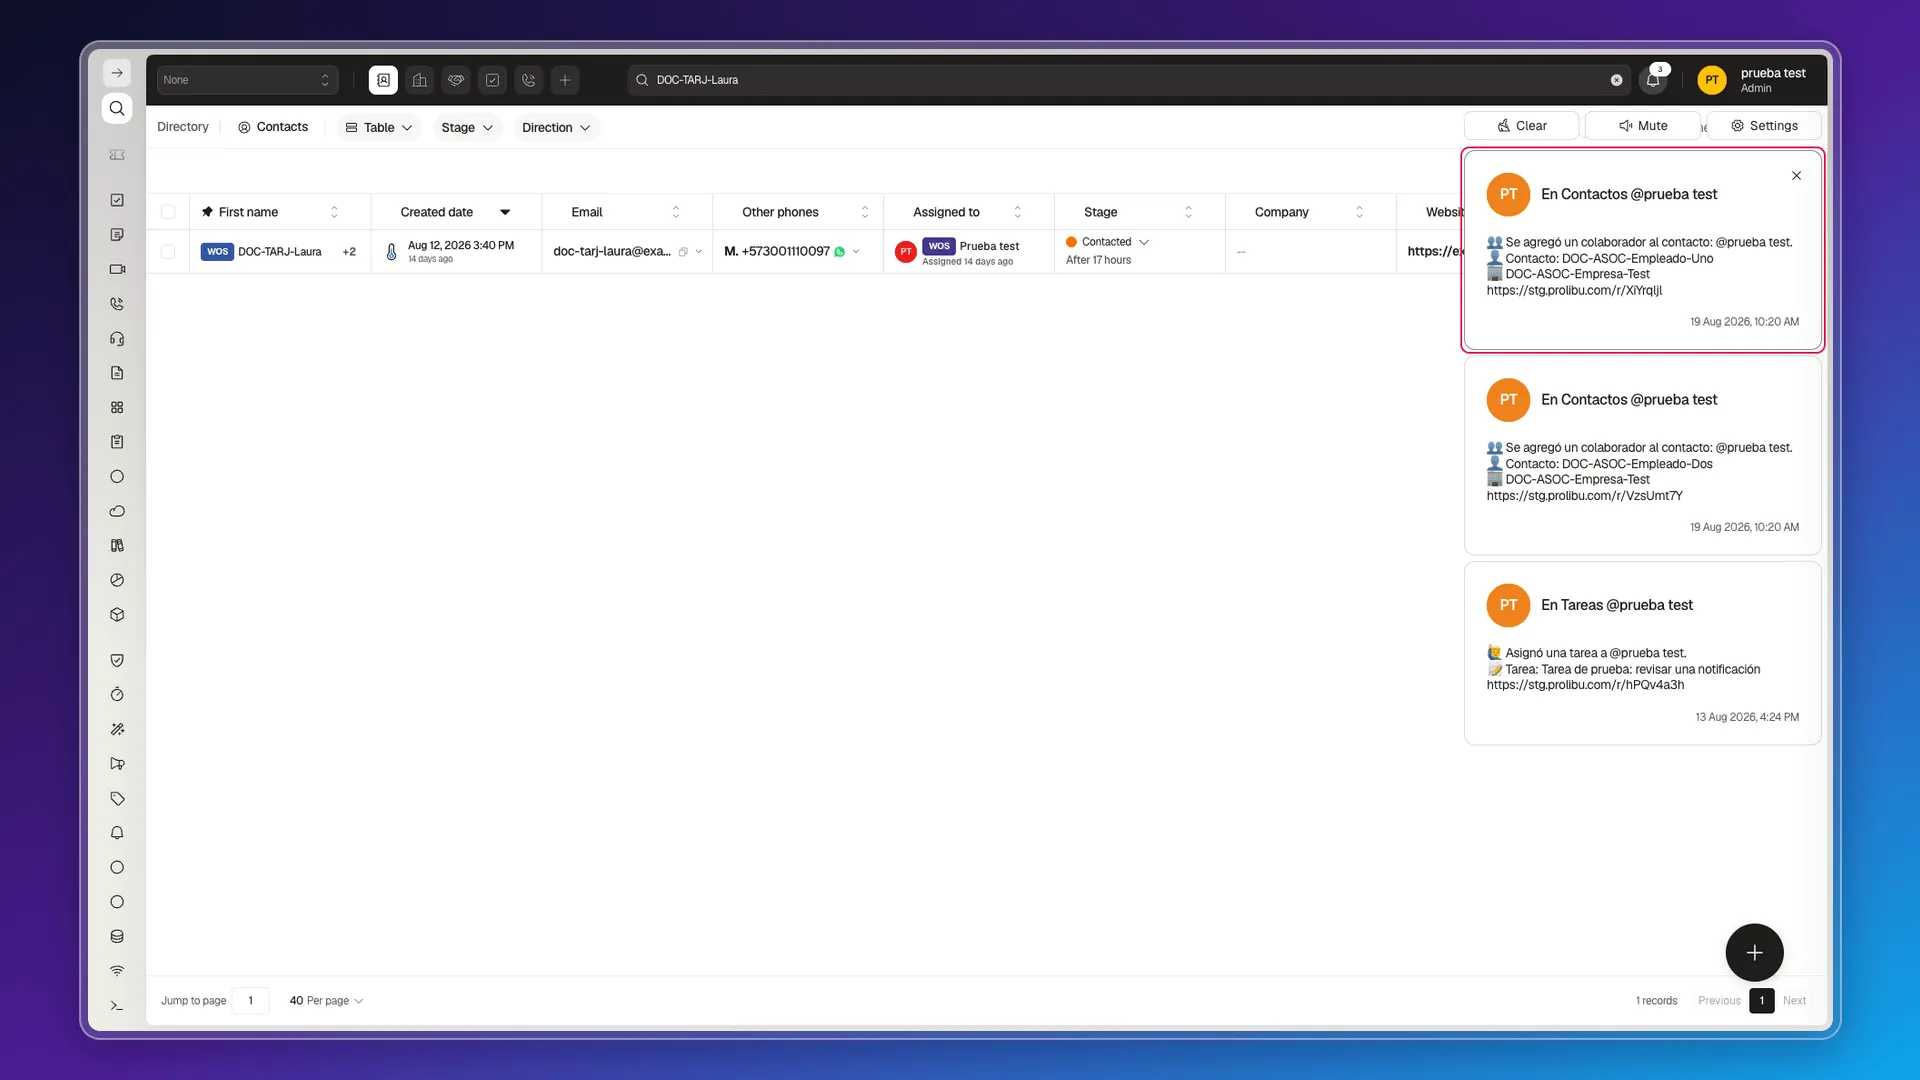
- Select a notification to open the related item or action when one is available.
Manage the inbox
Section titled “Manage the inbox”- Select Dismiss on a notification to remove it from the list.
- Select Mute to stop the sound alert.
- Select Settings to adjust notification preferences.
- Select Clear when you no longer need the notifications shown.
Configure notifications
Section titled “Configure notifications”- Open the bell and select Settings.
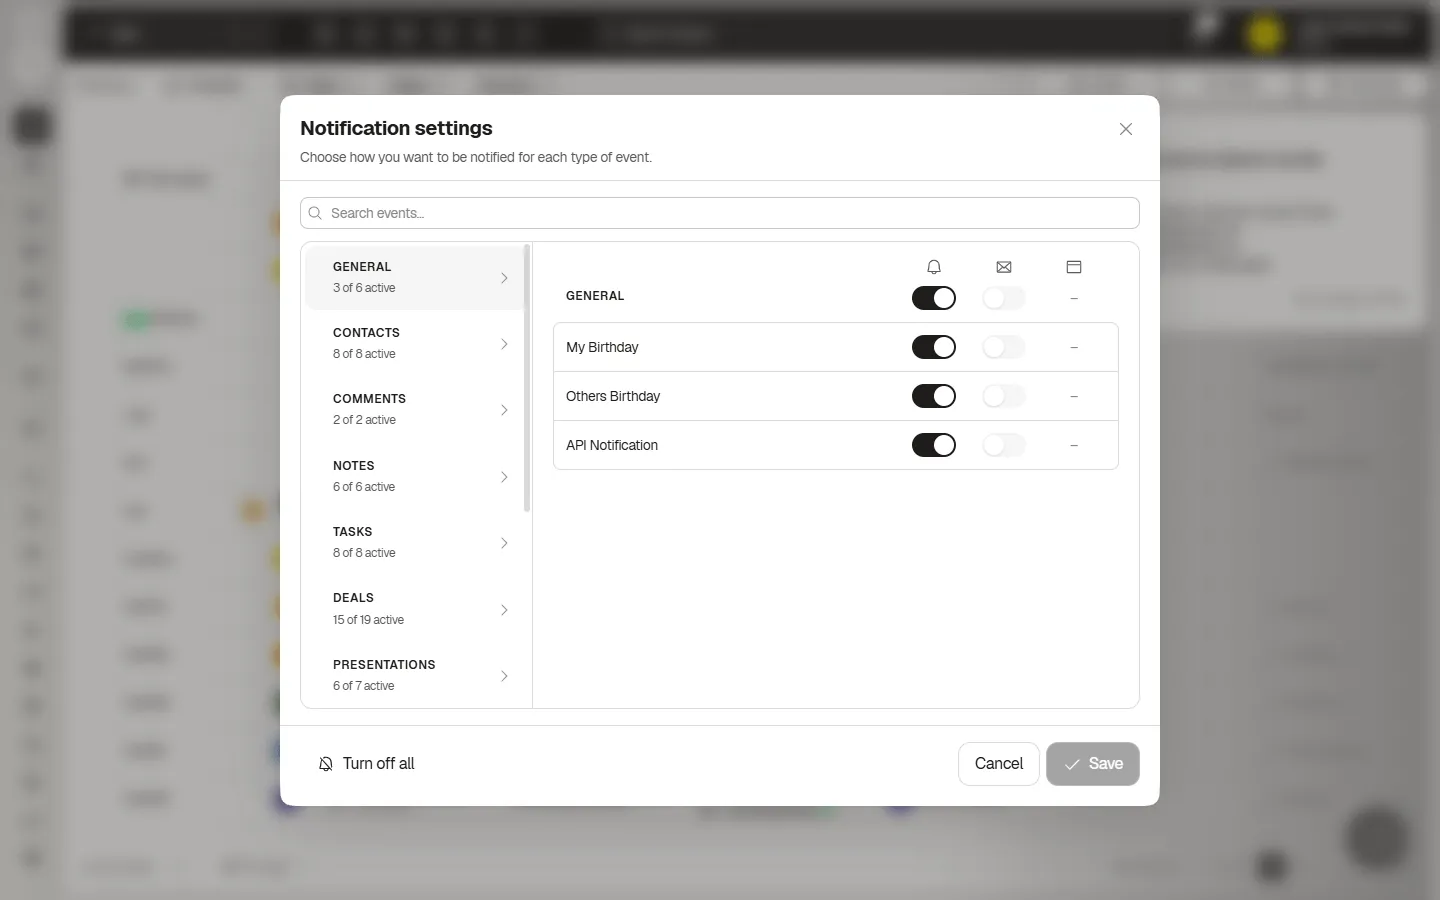
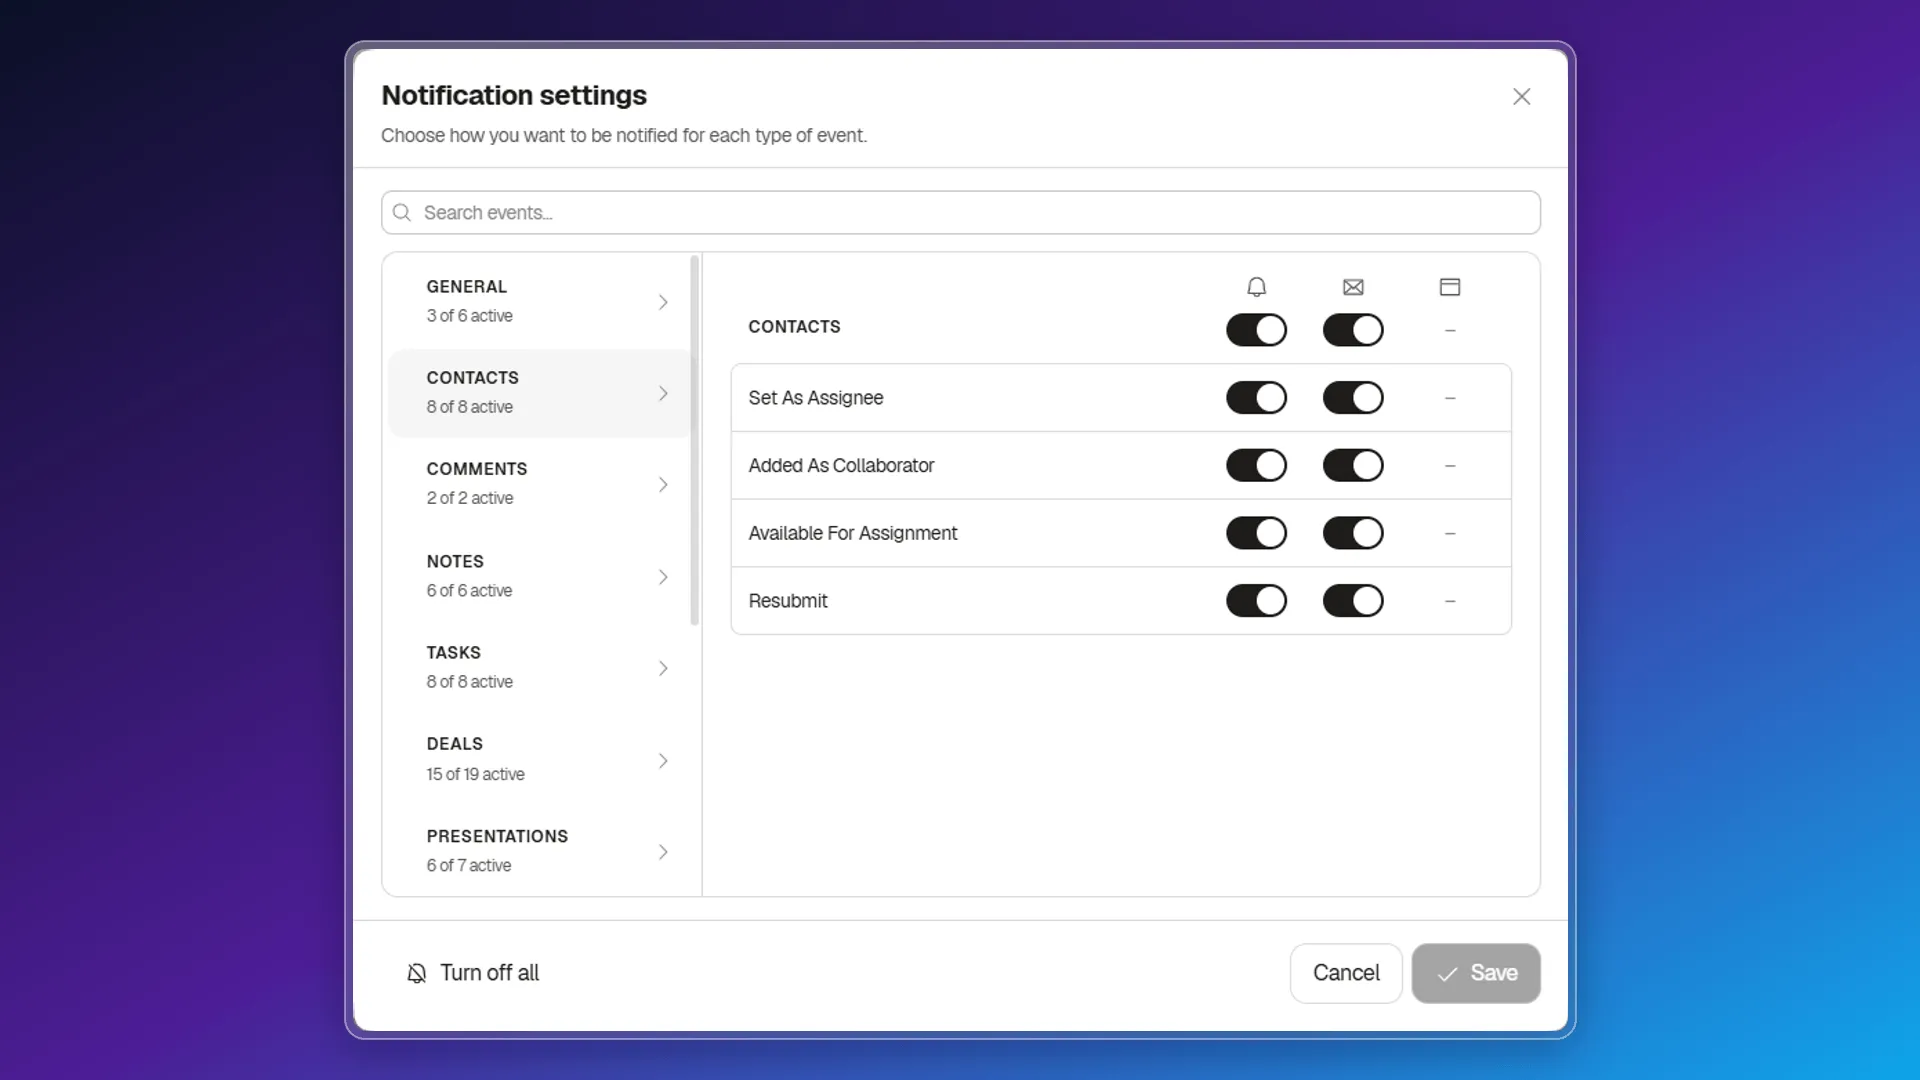
- Choose an event category in the left column, or use Search events… to find a specific event.
- Turn the channels you need on or off.
- Select Save to apply your changes.
Choose a category
Section titled “Choose a category”The left column groups alerts by area, such as General, Contacts, Tasks, or Deals. The count under each name shows how many events in that category are active. Select a category to see its events; scroll the list when more areas are available.
Adjust an event’s channels
Section titled “Adjust an event’s channels”Each row represents an event. The bell controls in-app alerts, and the envelope controls email alerts. A dash means that channel is not available for that event.
Each category header also has one switch per channel. Use it to turn that channel on or off for every event in the category, then adjust an individual row when it needs an exception.
Search for an event
Section titled “Search for an event”Enter part of an event name in Search events… to narrow the options and find the preference you need to change. This saves you from browsing categories one by one when you already know the alert you need.
Save or turn off all
Section titled “Save or turn off all”Save becomes available after you change a preference and confirms the new setup. Cancel lets you leave the dialog without confirming pending changes.
The Turn off all button sits at the bottom of the dialog, but in the test session it had no effect: the switches stayed the same, Save remained disabled, and clicking it fired no network request. Don’t rely on this button to turn off every alert at once — disable each category or event by hand instead.
If you do not receive an expected alert
Section titled “If you do not receive an expected alert”Open Settings, search for the event, and confirm that its available channel is enabled before saving. A dash means that channel cannot be used for that event; it is not an off switch. If the category count changes, return to the inbox to review pending alerts.
🎥 Video coming soon.
Frequently asked questions
It shows how many notifications still need your attention.
Open notification settings and choose the event or category you want to review.
Was this article helpful?
Thanks for your feedback!