
Determine filter criteria
Filters limits the records in the table you have open. The button sits top right, in the action bar: it’s the first of the three, just left of Refresh and More actions.
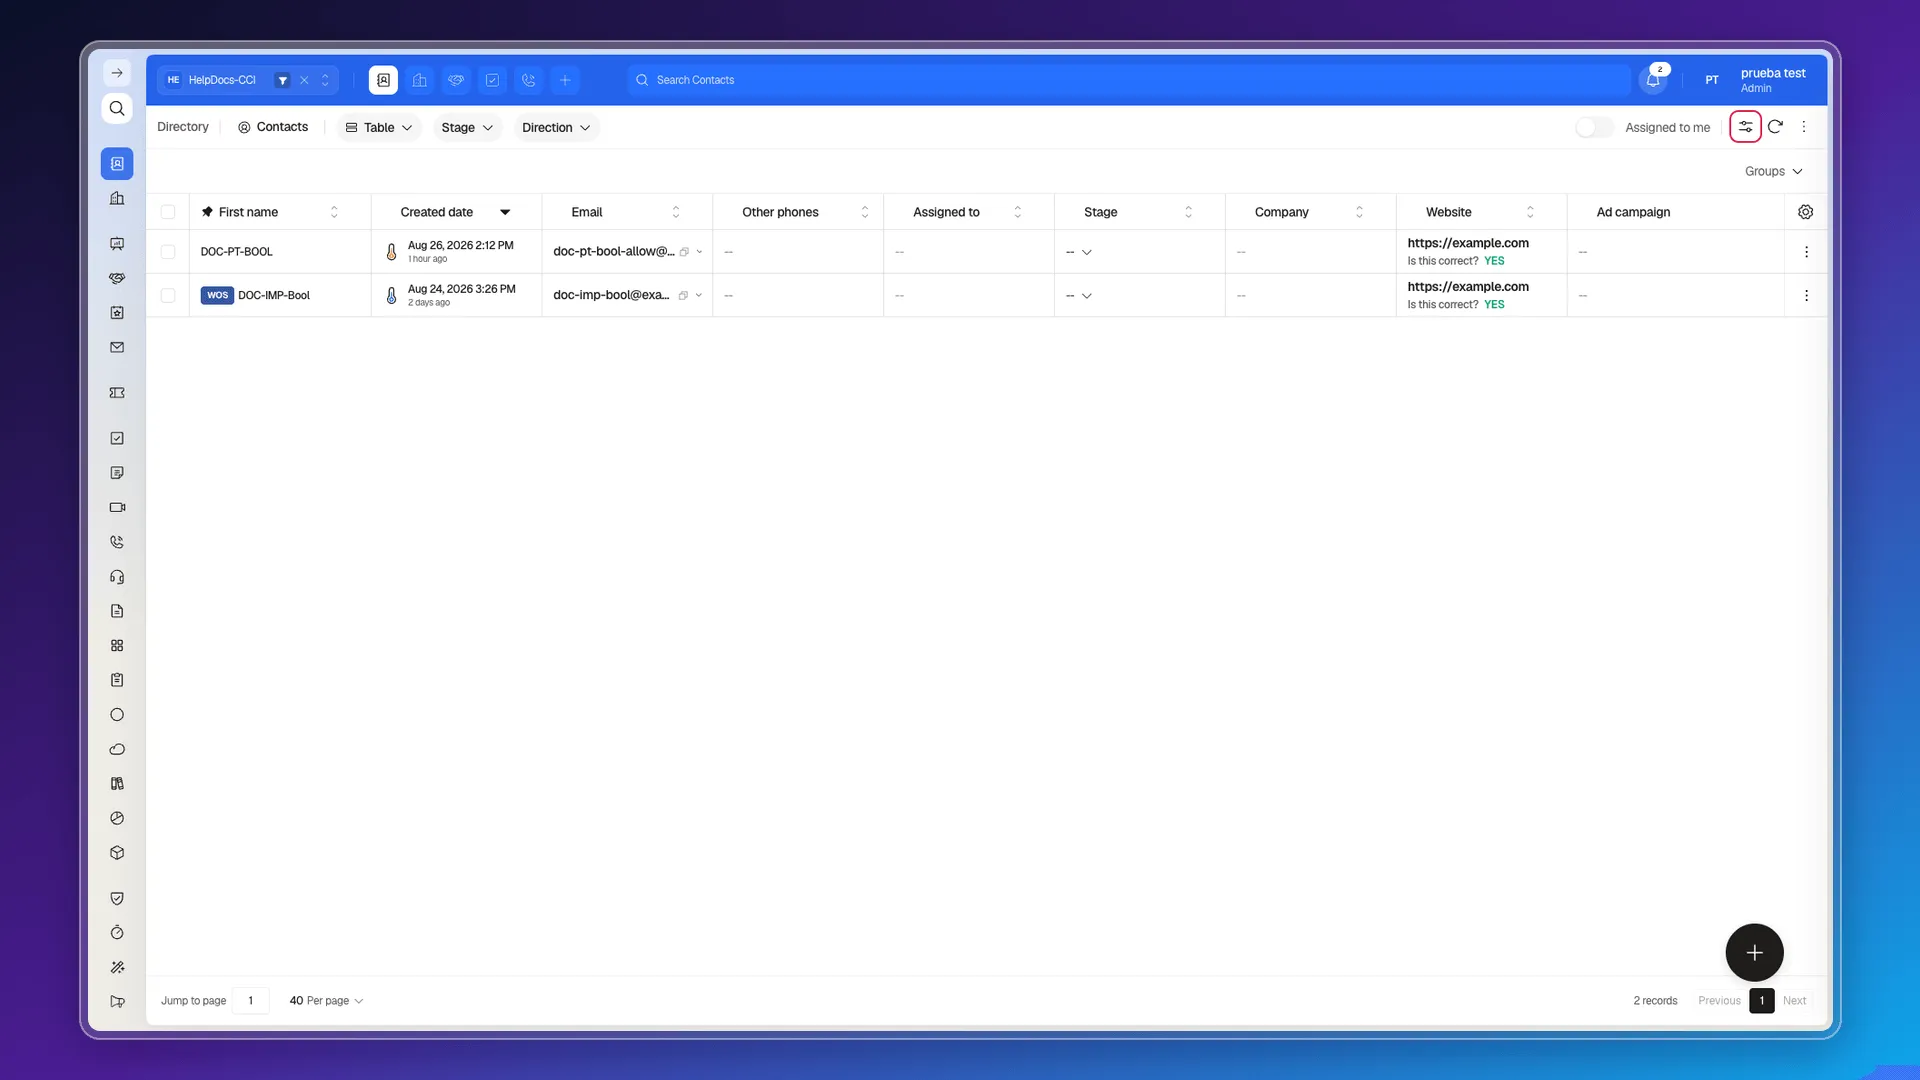
Its fields change with the module — what you see on Contacts isn’t what you see on Tickets.
The panel has two modes, Simple and Advanced, and they don’t share anything. Start checking boxes in Simple, then switch to Advanced, and the builder greets you empty — it doesn’t carry over what you had. Pick the mode you need and build the whole filter there before applying it.
Apply a simple filter
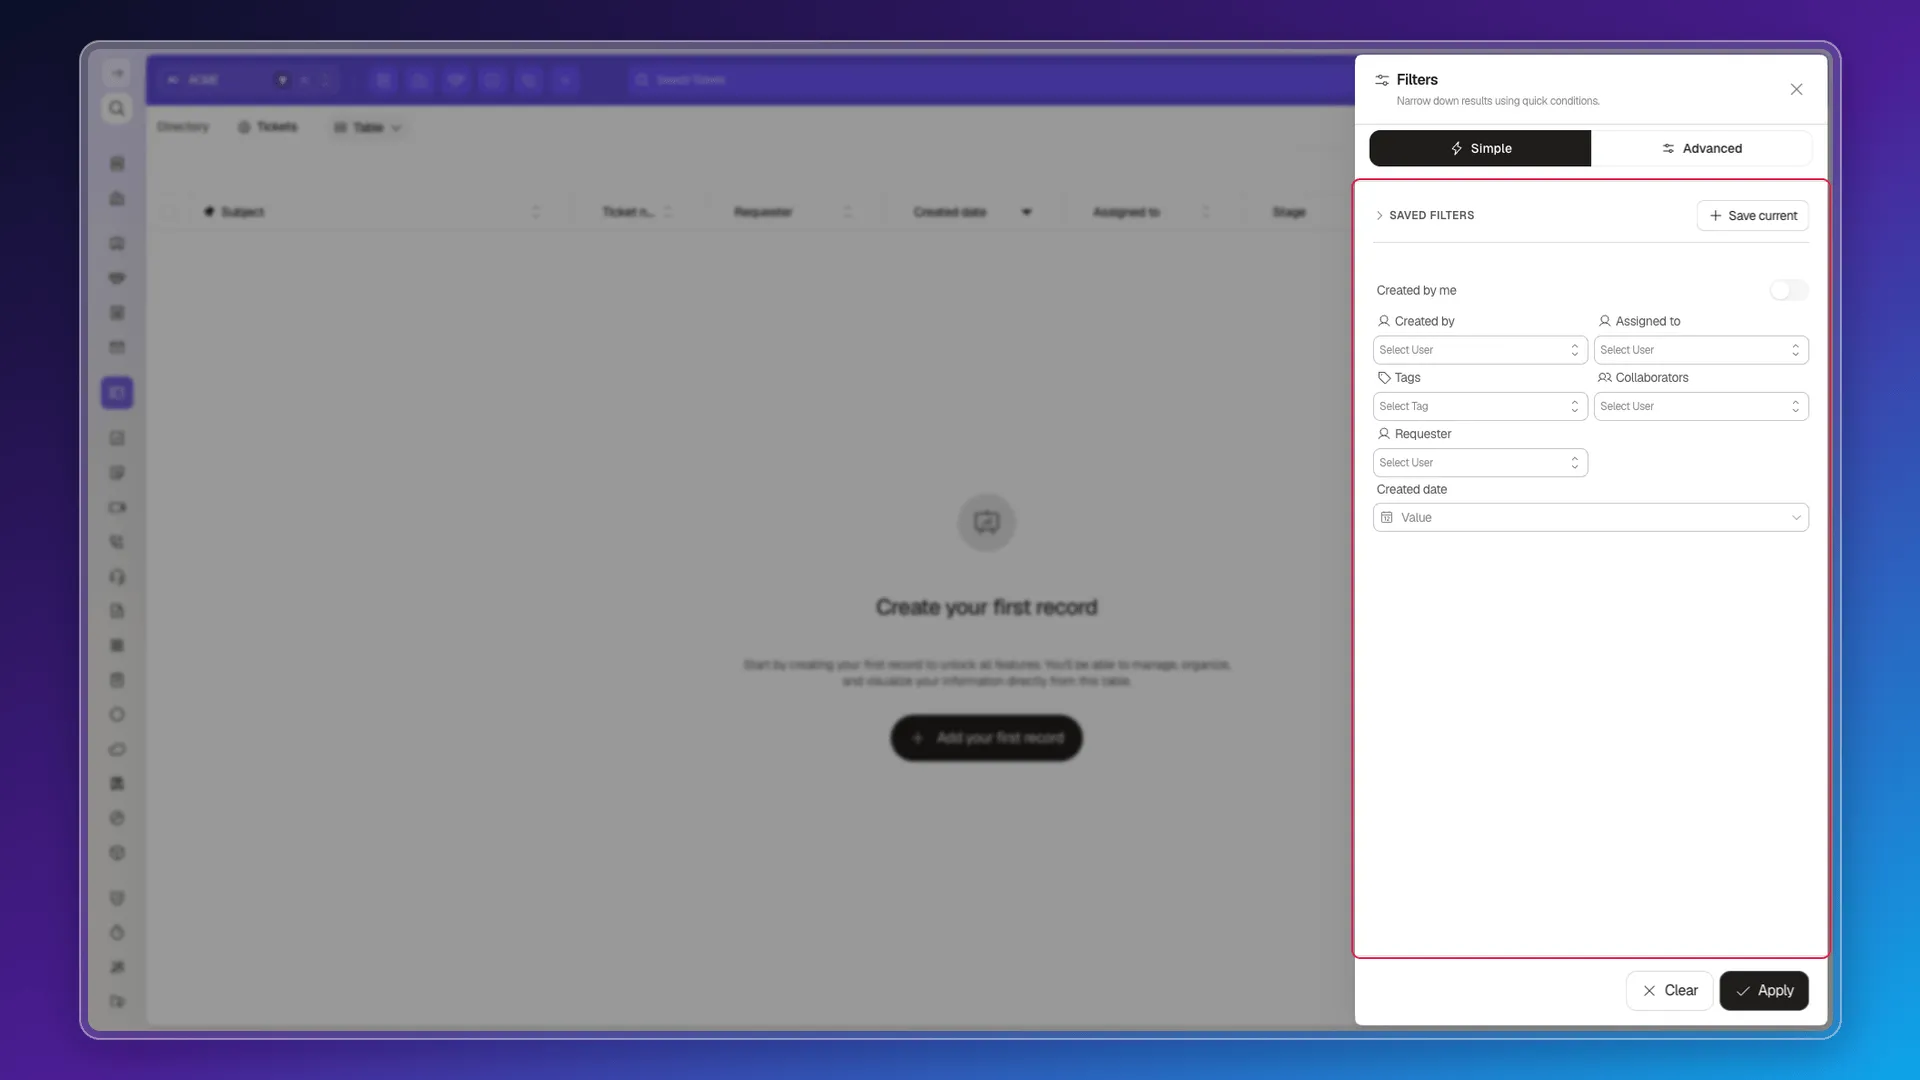
Section titled “Apply a simple filter”Simple is the fast mode: useful when you already know the person, tag, or date you’re after, without thinking about operators.
- Open the module and select Filters.
- Keep the Simple tab selected.
- Enable or complete the conditions you need.
- Select Apply.
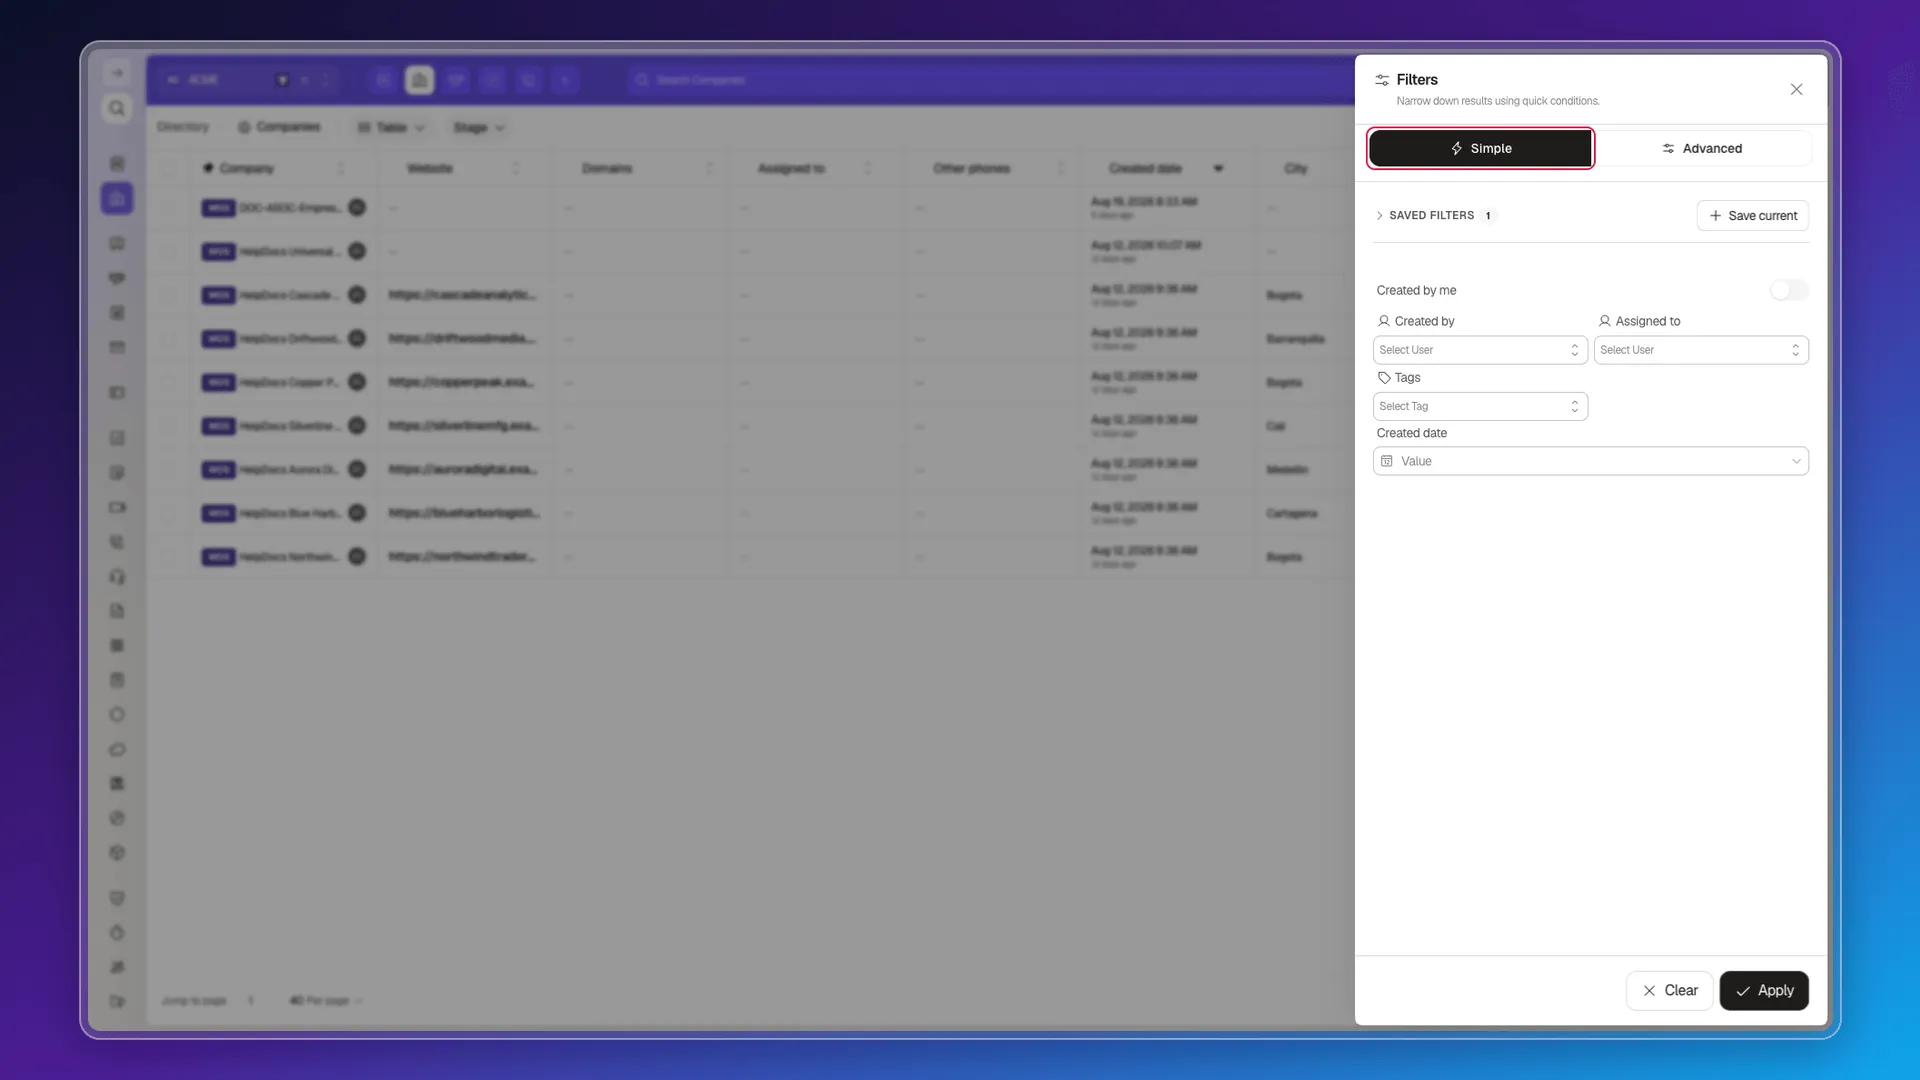
You can fill in several conditions at once — a tag, a date range, a user — and they all combine when you apply.
Assigned to me and Created by me
Section titled “Assigned to me and Created by me”The names sound alike, but they behave differently and live in different places:
- Assigned to me sits in the toolbar, next to Filters — not inside the panel. It takes effect the instant you switch it on, no Apply involved: the table narrows right away and a chip appears with the filter’s name, plus a Clear all link to remove it.
- Created by me does live inside the panel, on the Simple tab, and shows what your own user created. Like every other condition there, it does nothing until you select Apply.
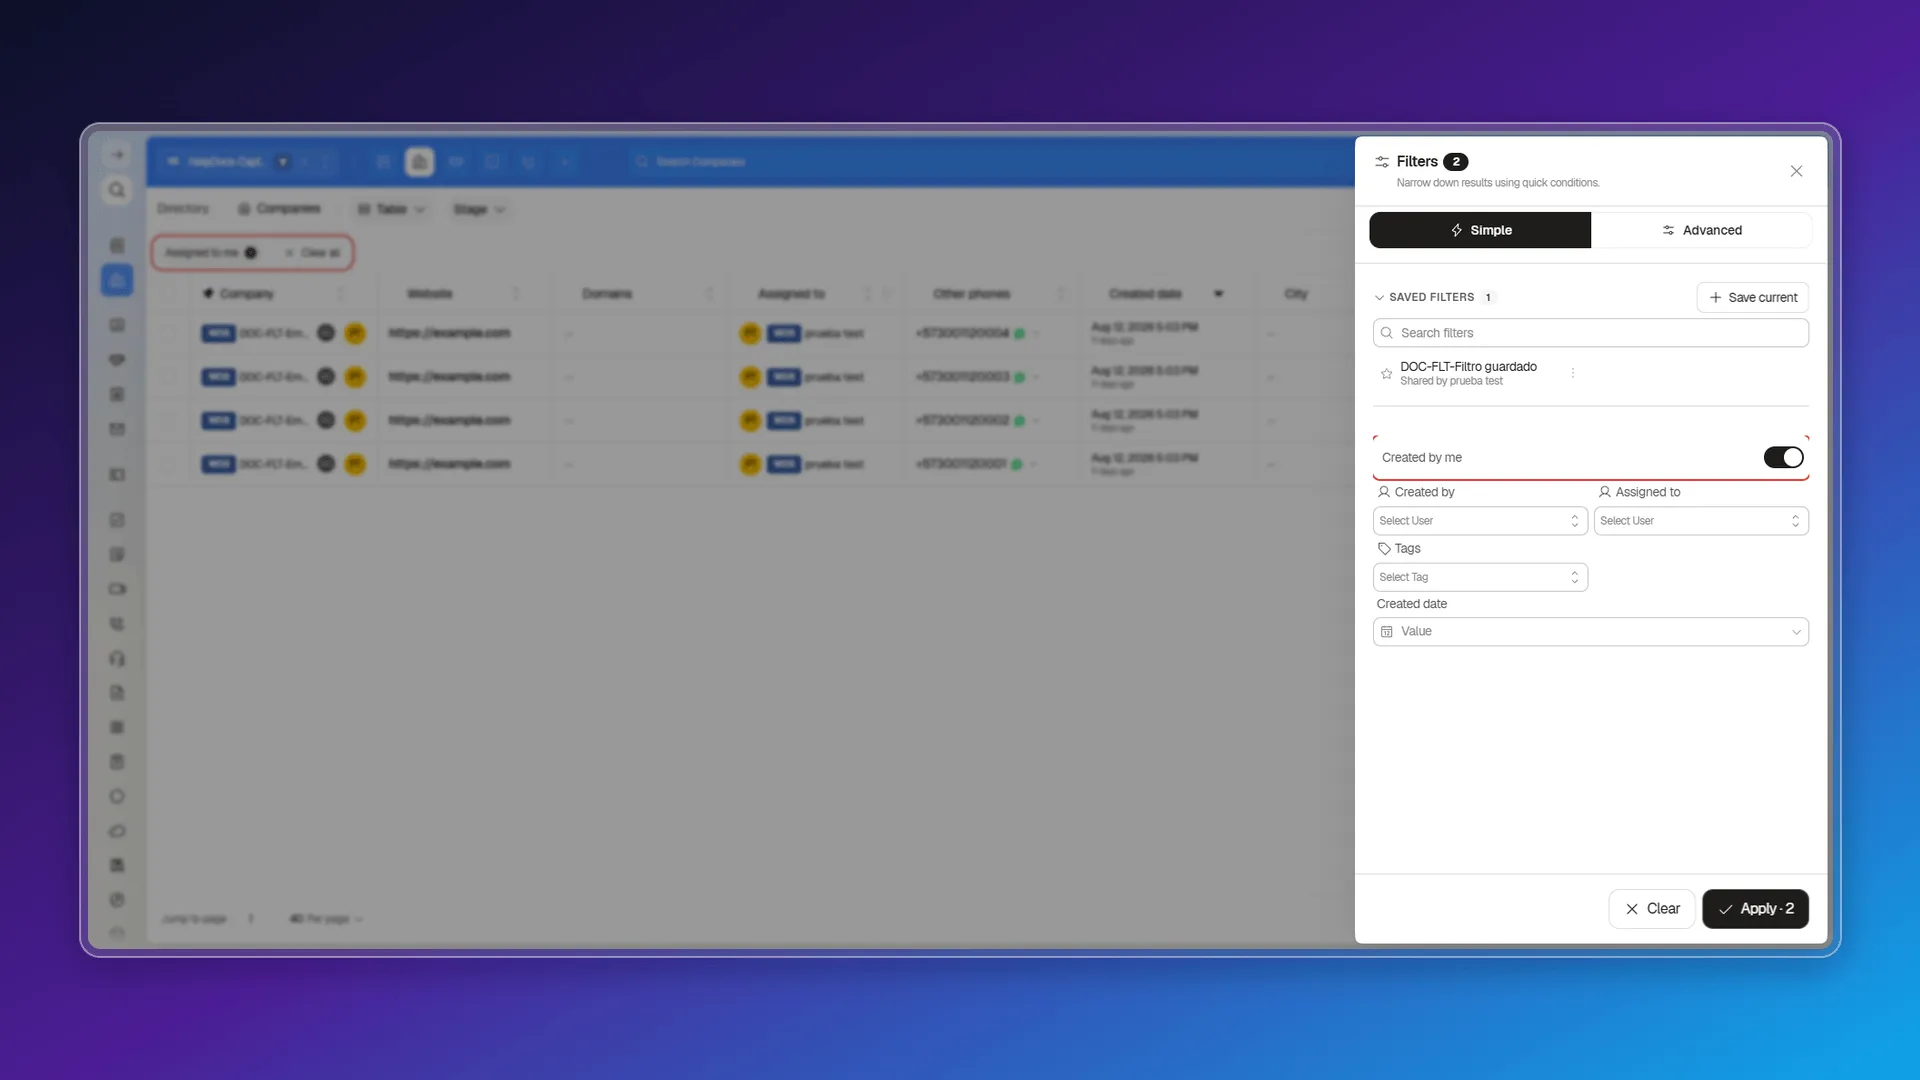
Both are simple on/off toggles — switch them back off whenever you want the table without that restriction.
Creator and assignee
Section titled “Creator and assignee”Created by and Assigned to open a user selector — pick someone and the table narrows to what’s tied to them. They only show up when the open module actually has those fields.
Tags opens its own selector, with a search box and each tag’s color, so you can keep just the records carrying the tag you pick. If the module doesn’t work with tags, this condition doesn’t even appear.
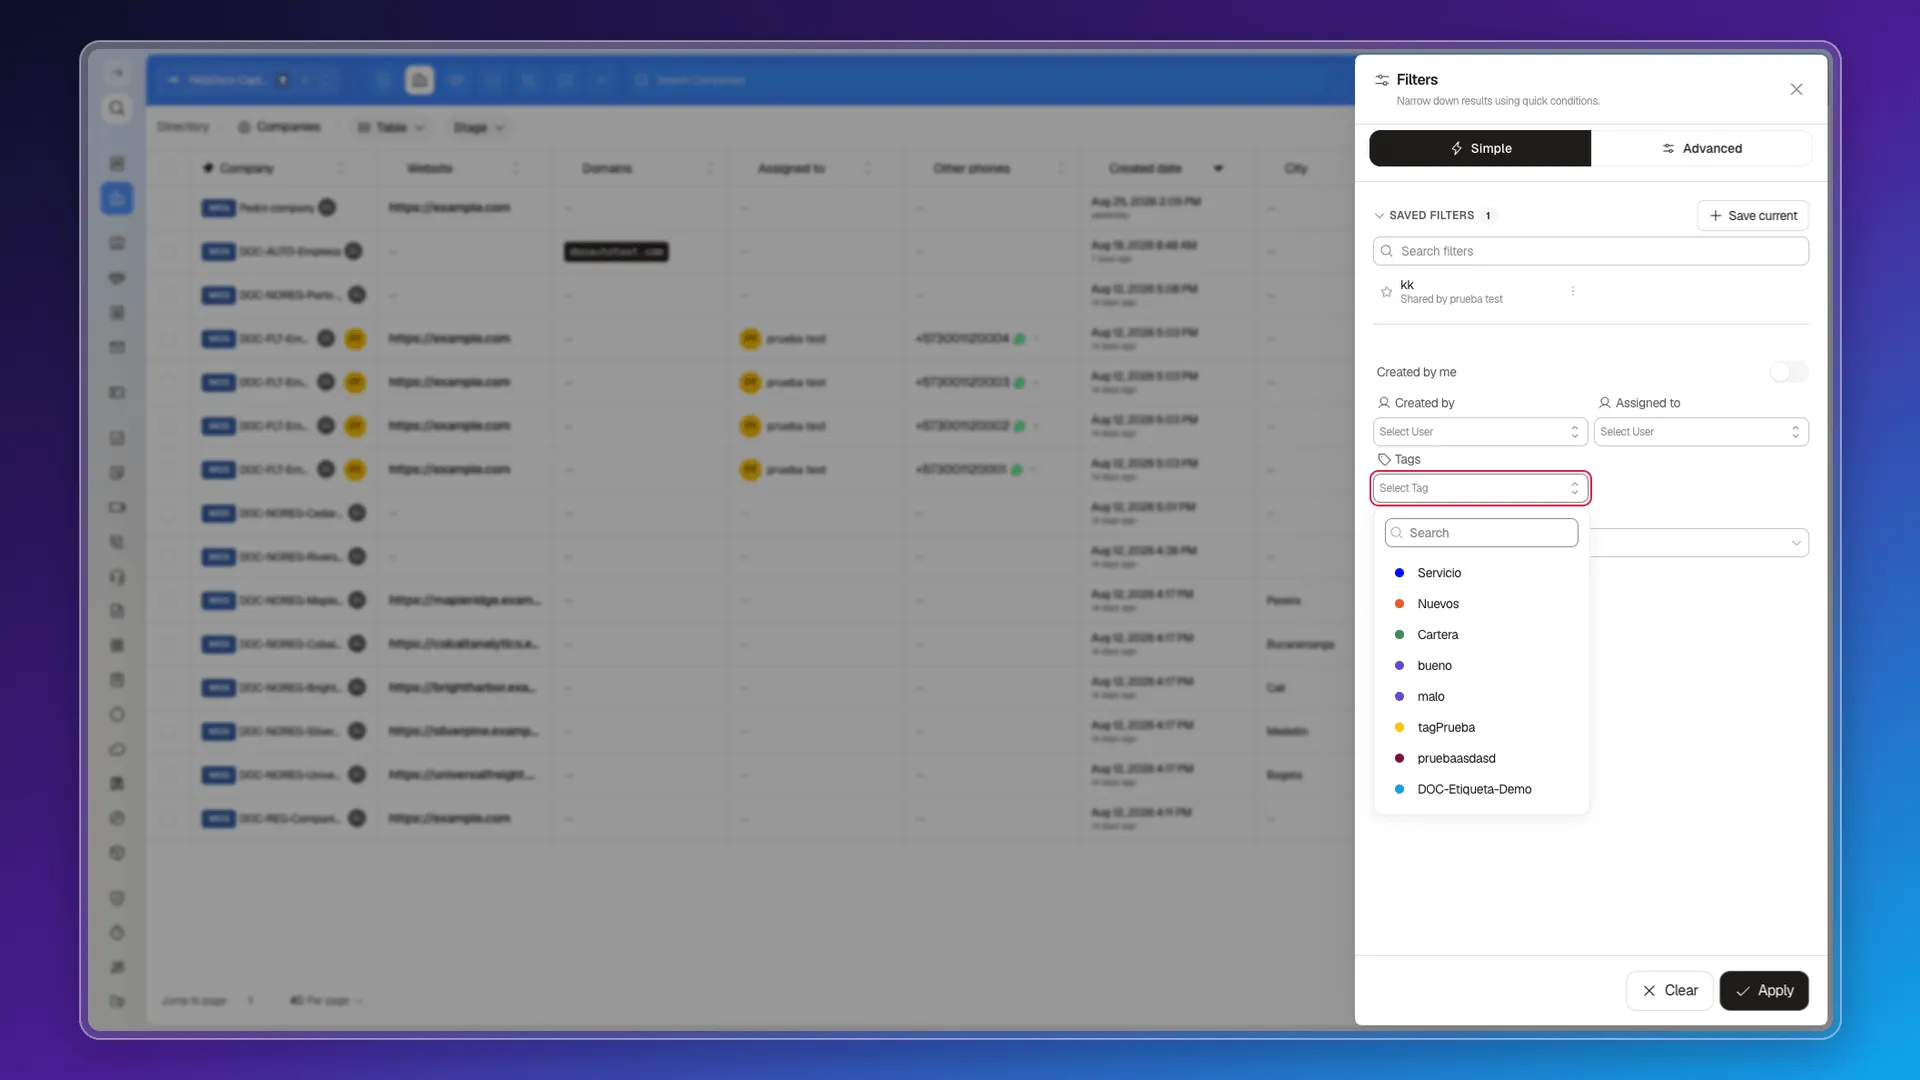
Creation date
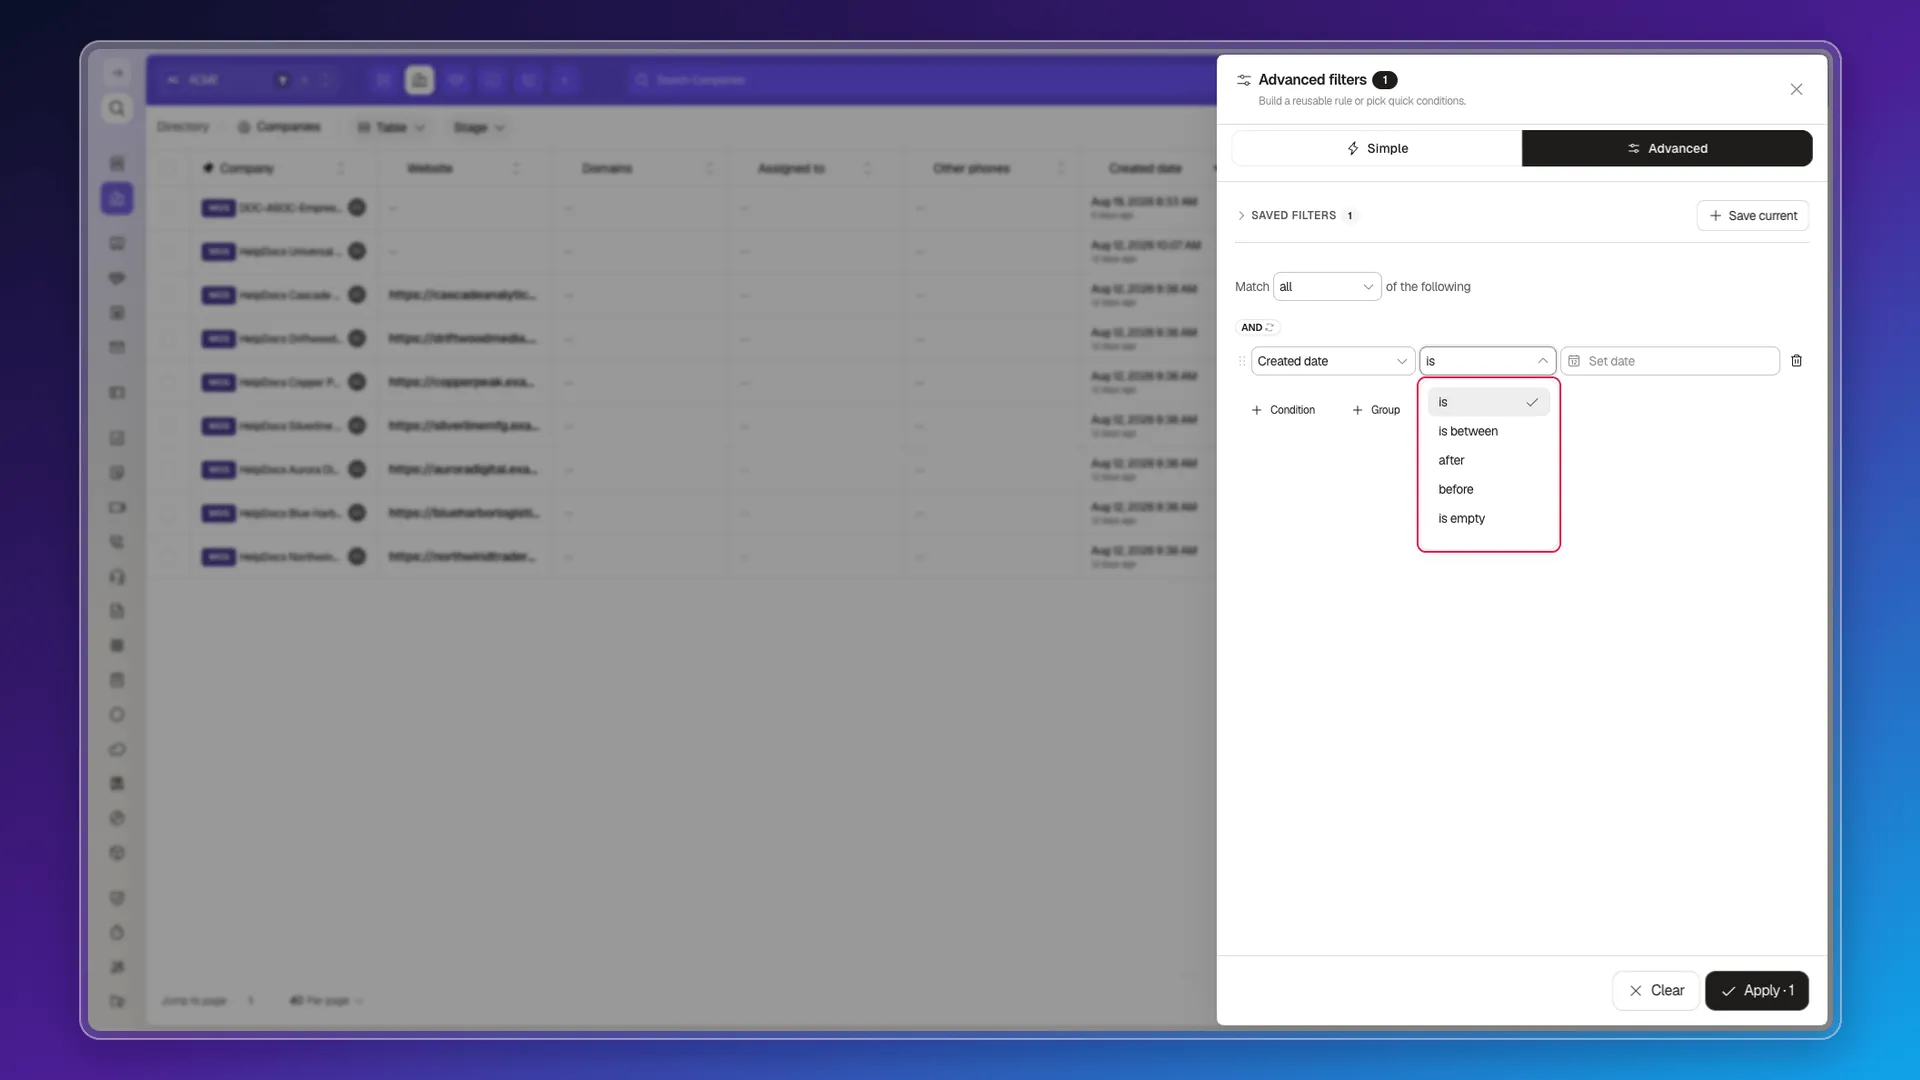
Section titled “Creation date”Under Creation date, select Value to set a date. Need something more precise than a single date? Switch to Advanced — there, dates support is, is between, after, before, and is empty, and is between is the one you want for a range.
Simple-filter variants
Section titled “Simple-filter variants”The list of conditions isn’t fixed — it changes with the module. Tickets, for instance, adds Collaborators and Requester, which Companies doesn’t have. It’s worth checking what the open module’s panel actually offers instead of assuming it’s always the same set of boxes.
Create an advanced filter
Section titled “Create an advanced filter”Advanced is where you go once Simple stops being enough: conditions combined with AND/OR, grouped, with the exact operator you need.
- Open Filters and select Advanced.
- Select Condition.
- Choose the field, operator, and value.
- Add another condition or a Group if needed.
- Select Apply.
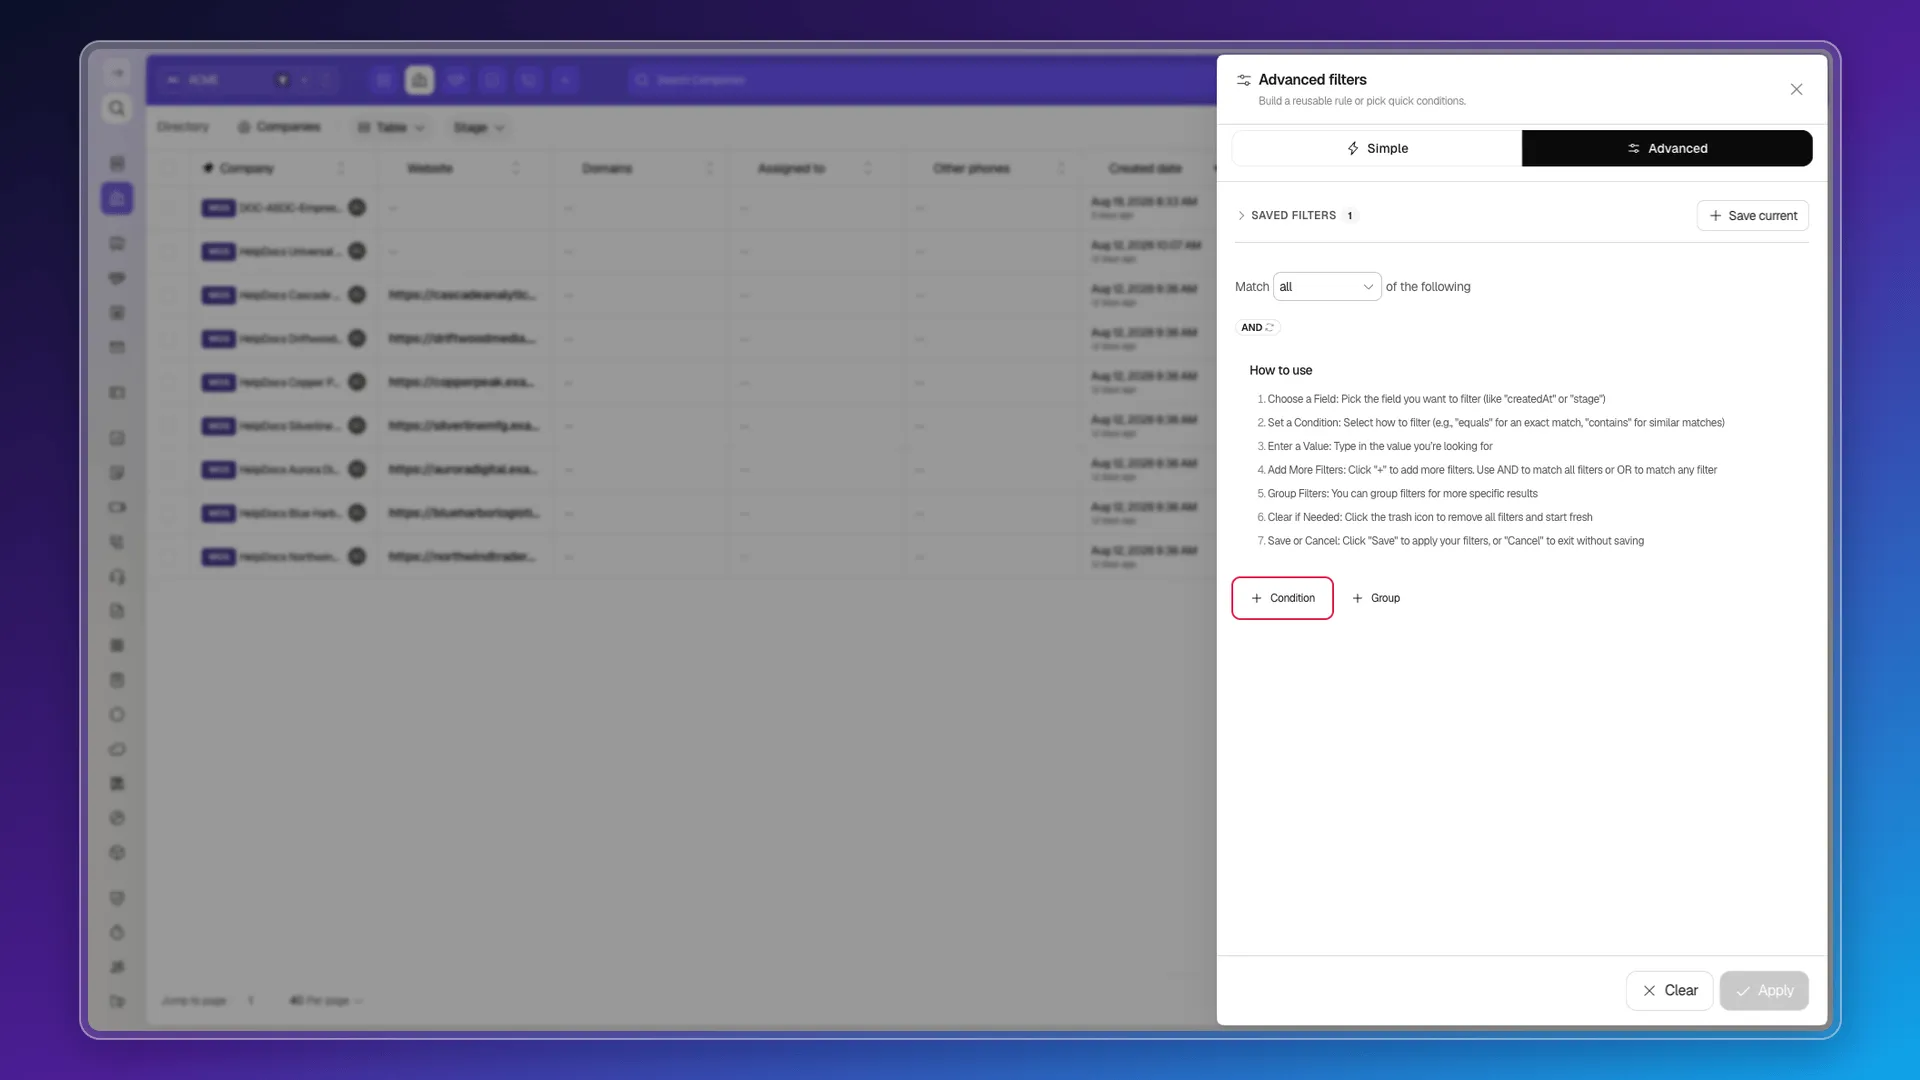
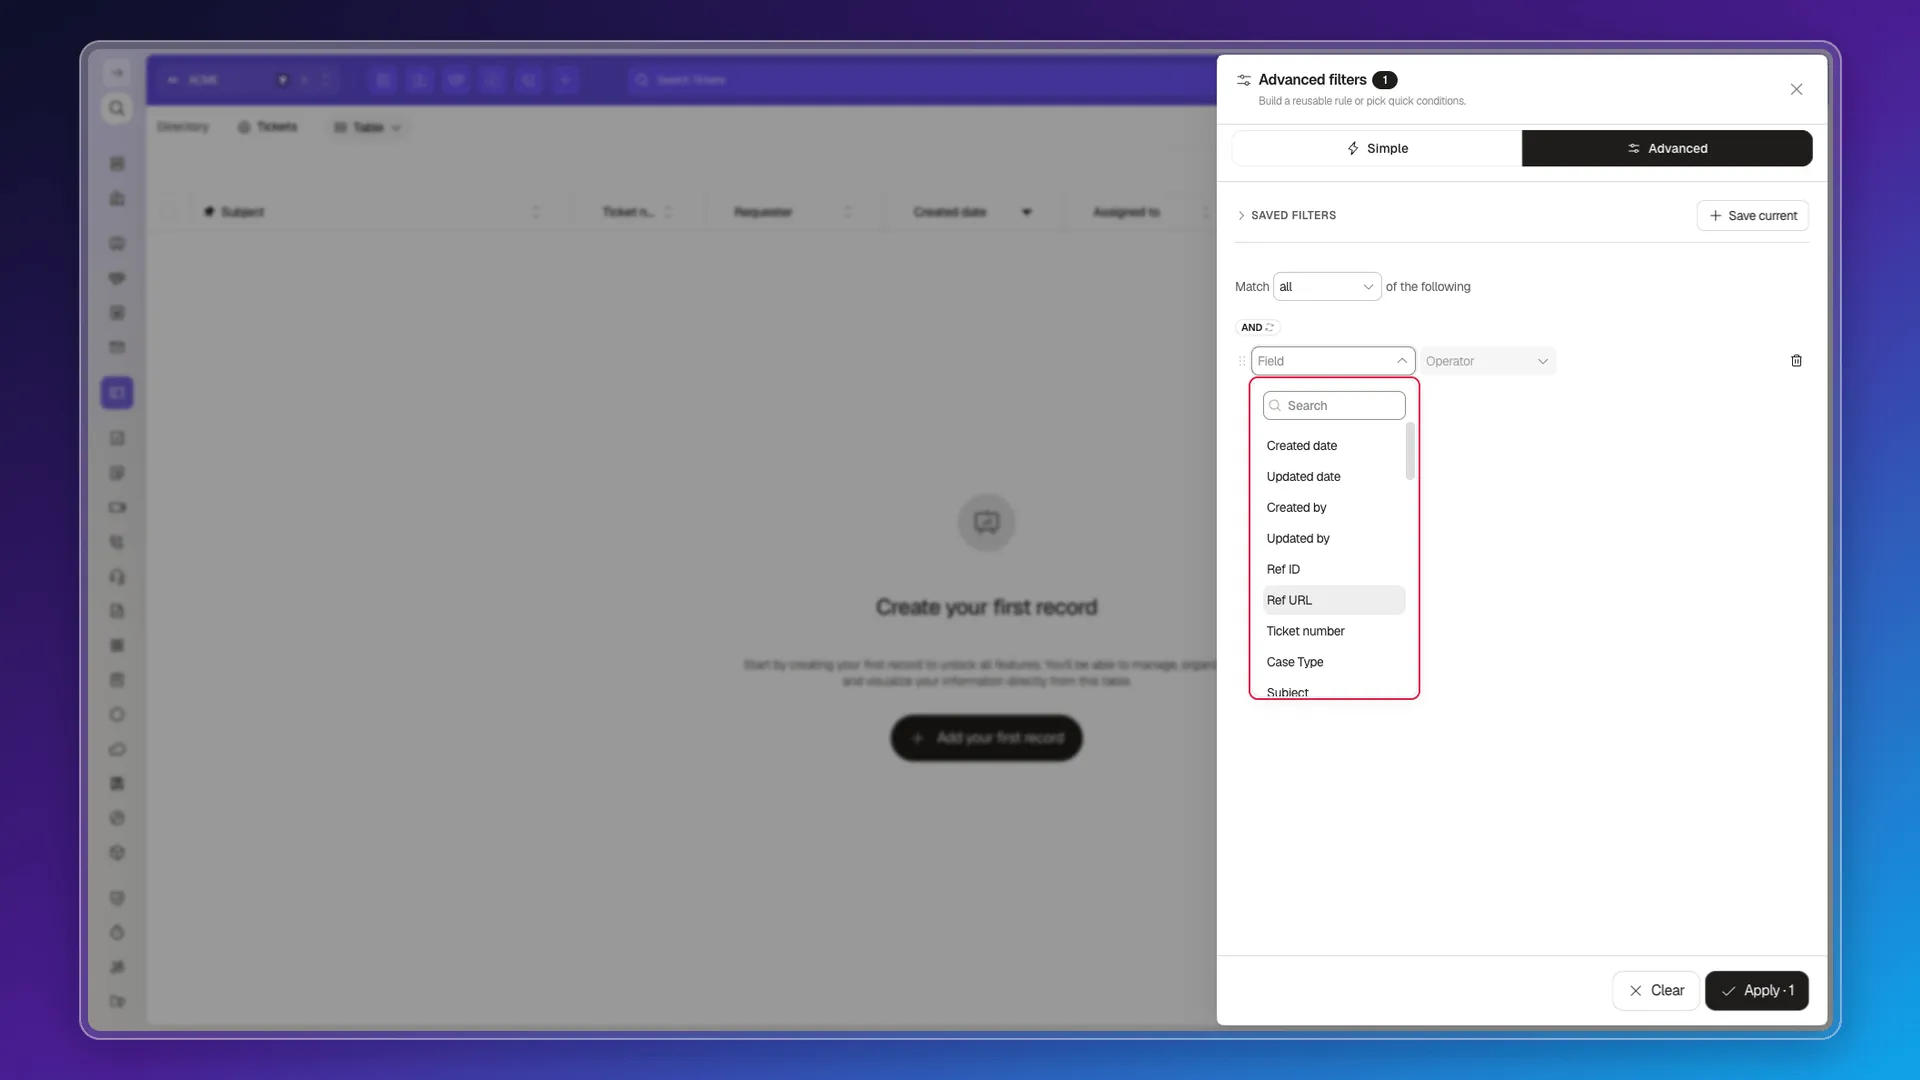
Every condition is built the same way, in three steps: Field (what data you’re comparing), Operator (how you’re comparing it), and Value (against what). The field type decides what that third step looks like — a text box, a calendar, or a selector.
Text fields
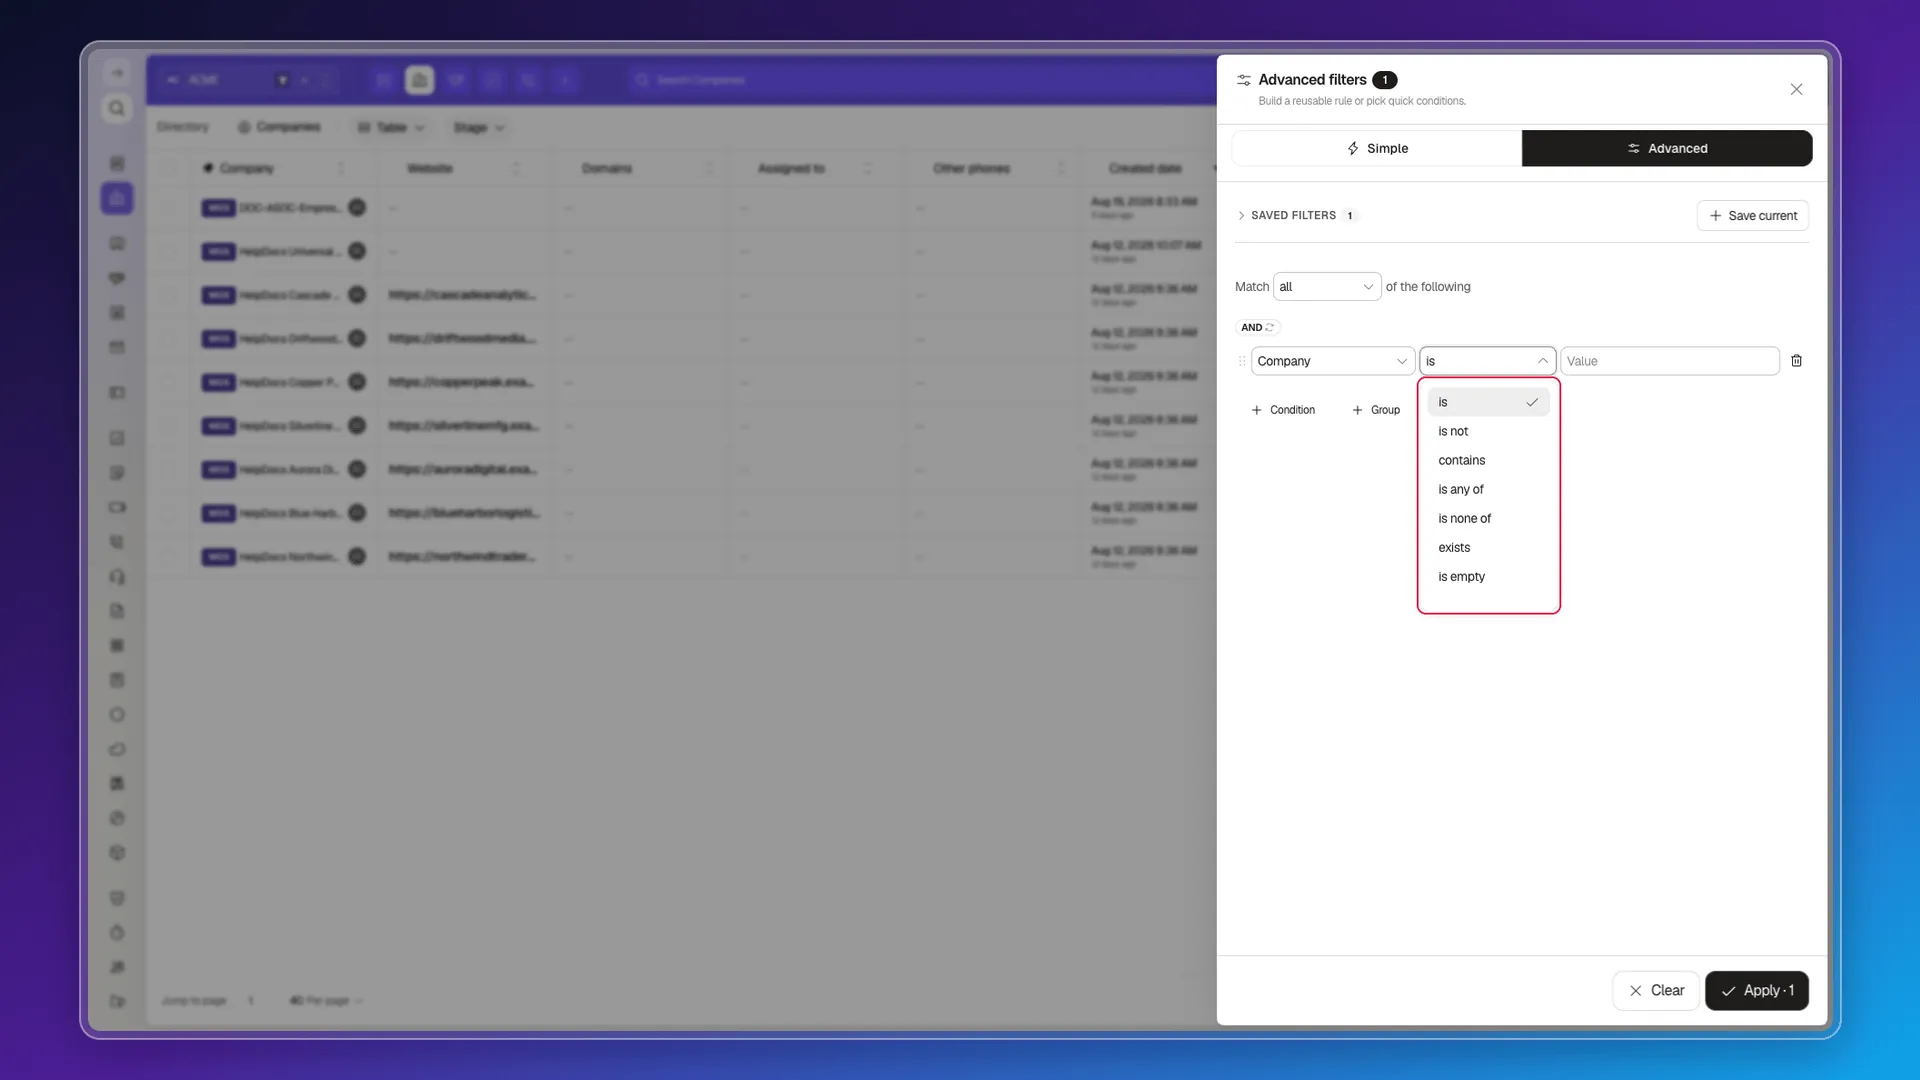
Section titled “Text fields”Company, Website, phone numbers, emails, codes, or URLs all work with a free-text Value box. Which operators you get depends on the field: is, is not, contains, is any of, is none of, exists, is empty.
Contains is for finding a fragment — part of a name, part of a subject; is demands an exact match. Exists and is empty need nothing else from you — they’re yes/no questions about whether the field has a value at all.
Date fields and ranges
Section titled “Date fields and ranges”Here Value is a calendar, not text. Is pins one date, is between brackets a range, and before / after set a single boundary in one direction. Is empty finds the records that never got a date in that field at all.
Selections: users and tags
Section titled “Selections: users and tags”The third flavor of Value: for person, assignment, or tag fields, you don’t type anything — you pick from a list, the same way you would in Simple mode, except now it’s inside a condition you can combine and group with the rest.
Fields available by module
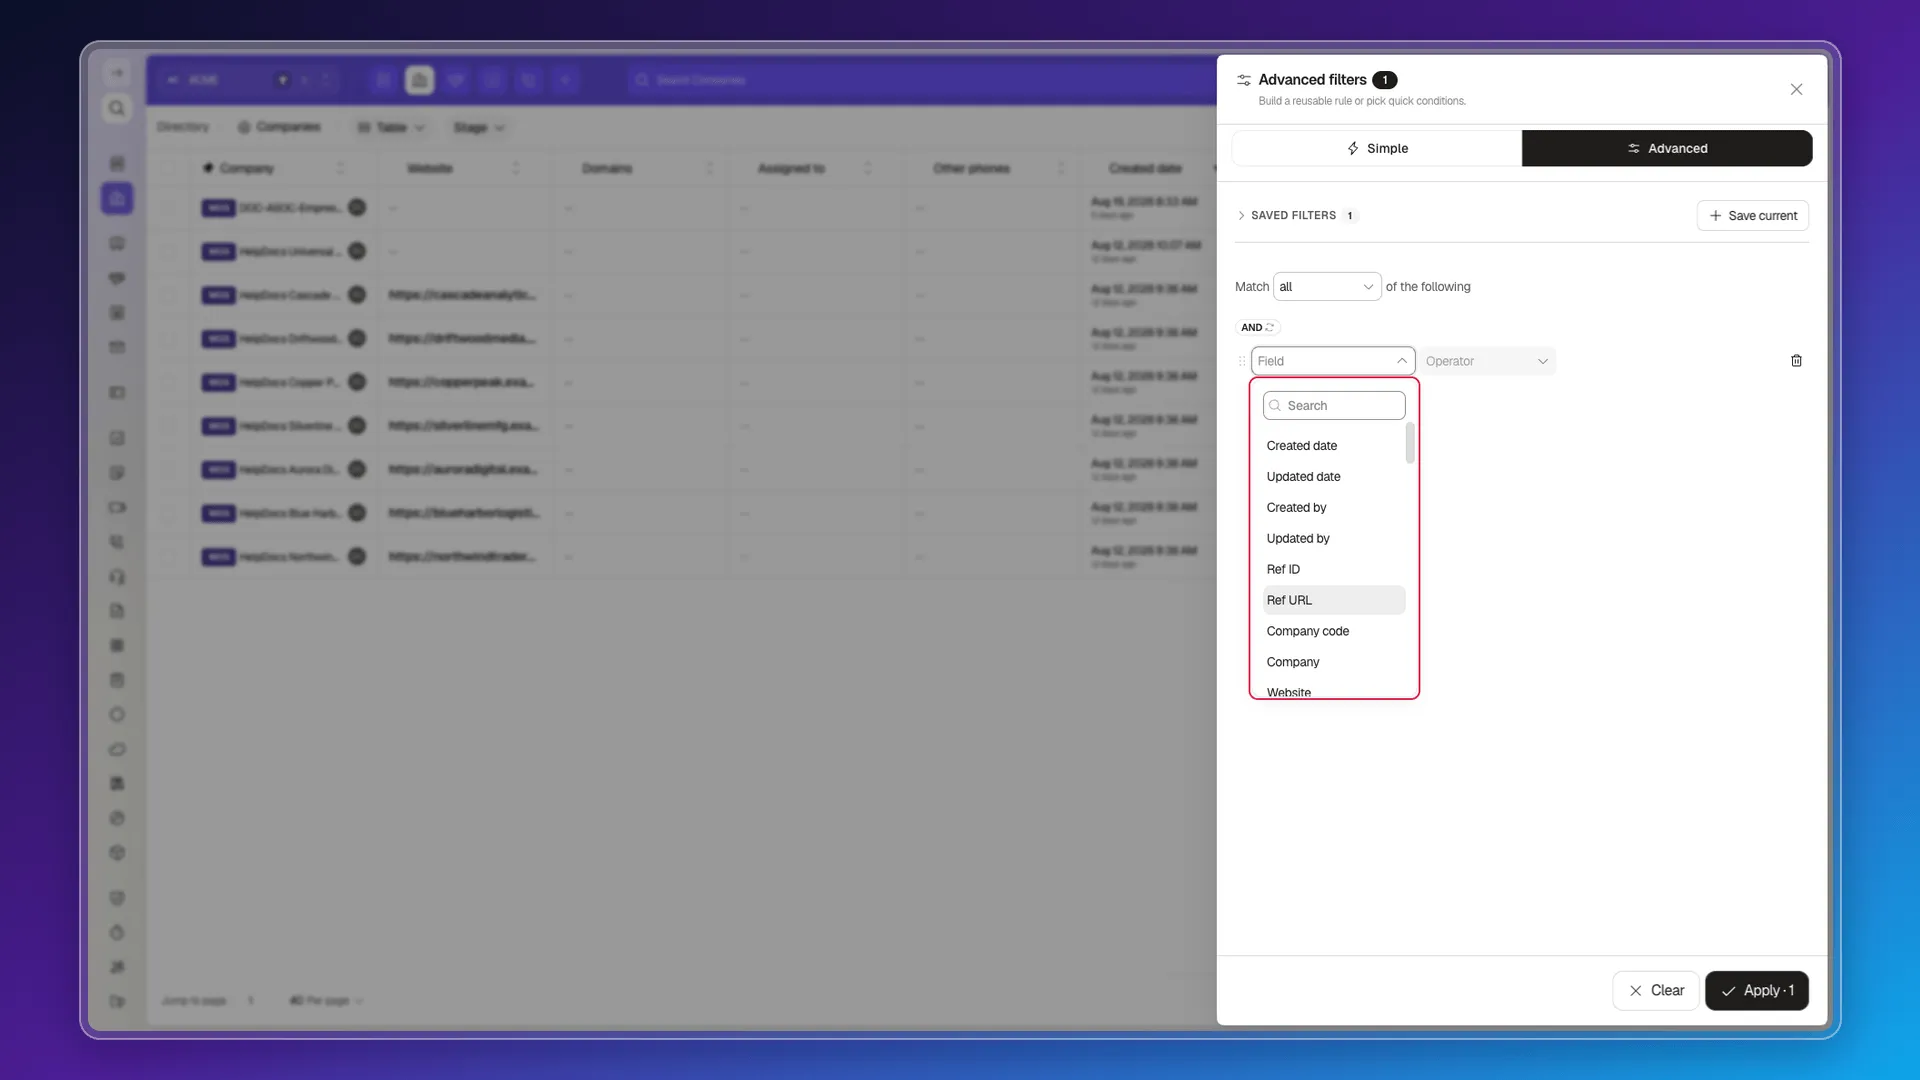
Section titled “Fields available by module”The Field menu reflects the open module’s real data, not a generic list. On Companies you’ll find creation and update dates, creator, reference ID and URL, company code, company, website, domains, email, and phone numbers; another module will hand you a completely different set.
Combine conditions with AND or OR
Section titled “Combine conditions with AND or OR”By default, Match requires all conditions — the AND operator: a record only qualifies if it meets every single one. Switch the dropdown to any and meeting just one is enough. Group lets you nest conditions to build rules more specific than a flat list.
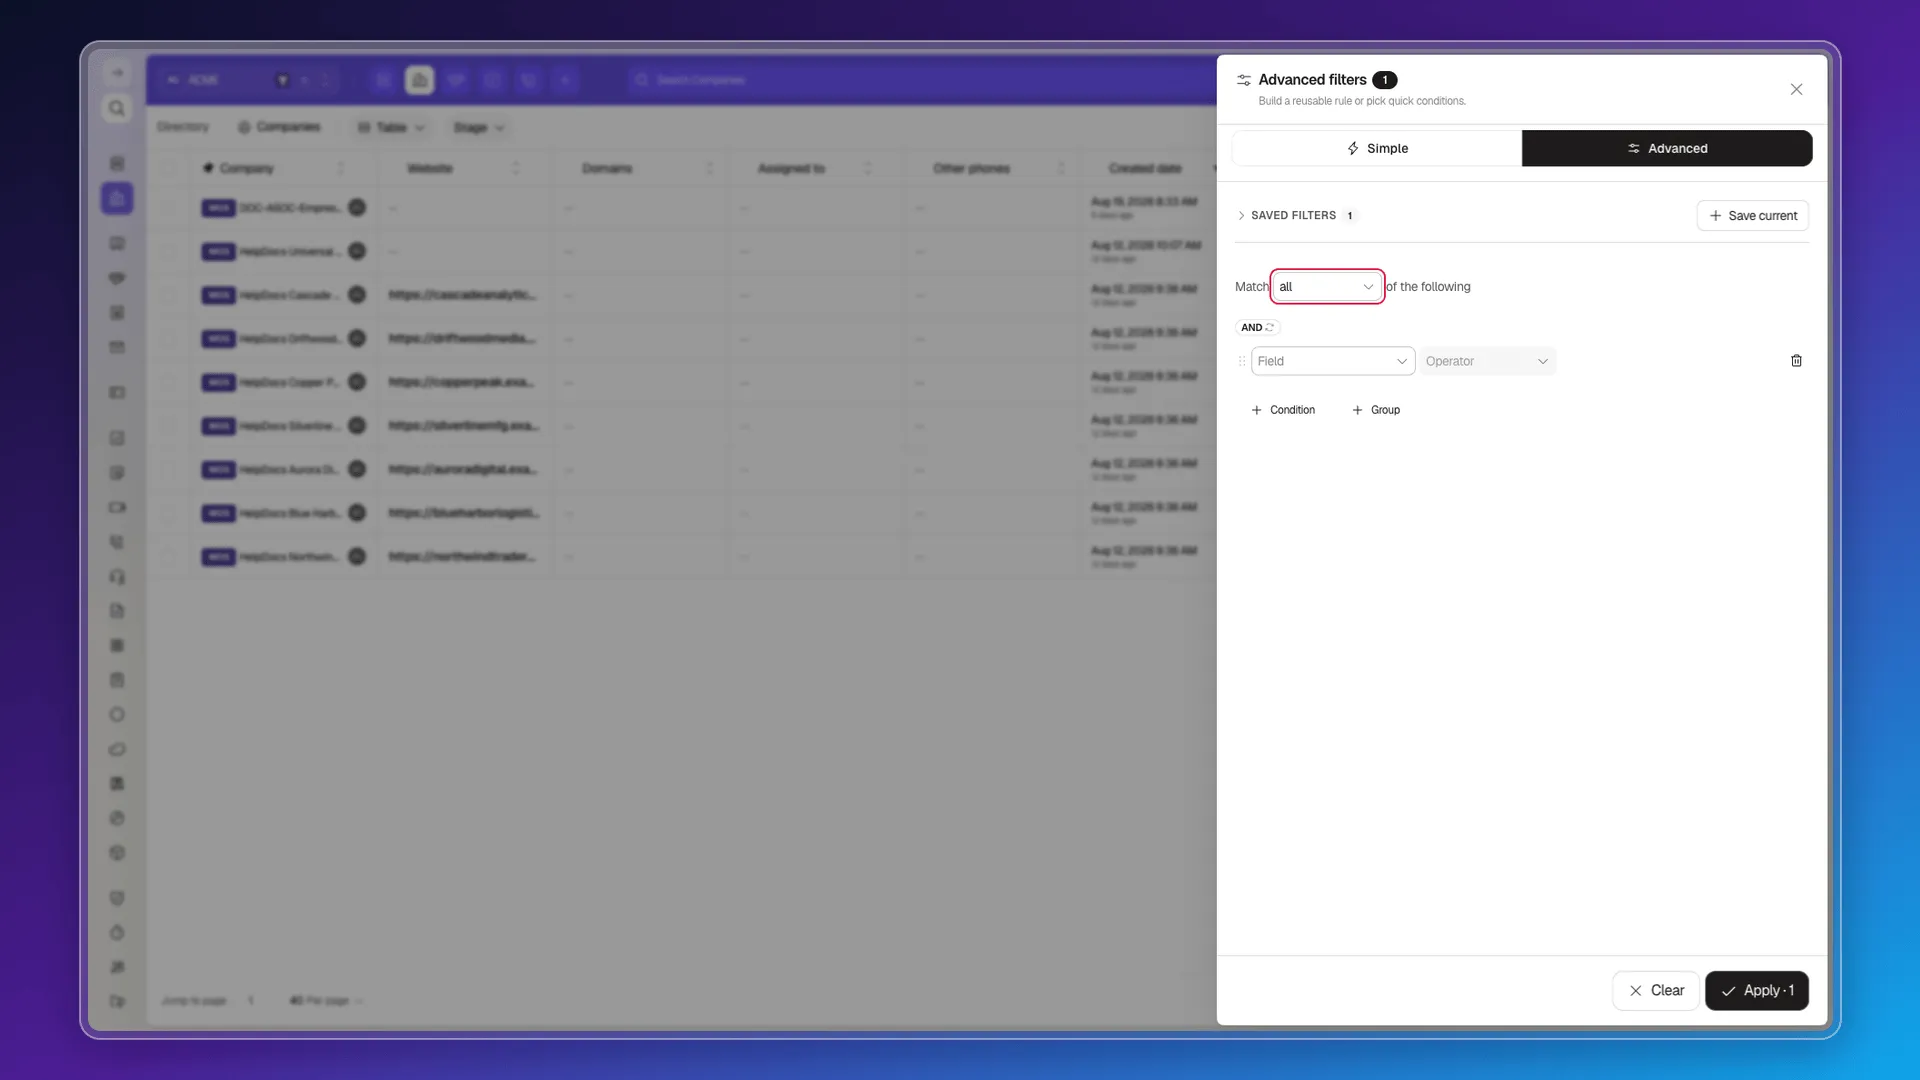
An example: with AND you’re asking for “assigned to Ana” and “created after a given date” — both at once. With any, meeting either one is enough. When you need to mix rules that only make sense evaluated together, put them in a group before combining them with the rest.
Remove one condition or clear all
Section titled “Remove one condition or clear all”The trash icon beside a condition deletes just that rule. Clear, at the bottom of the panel, wipes out everything you were building and lets you start over.
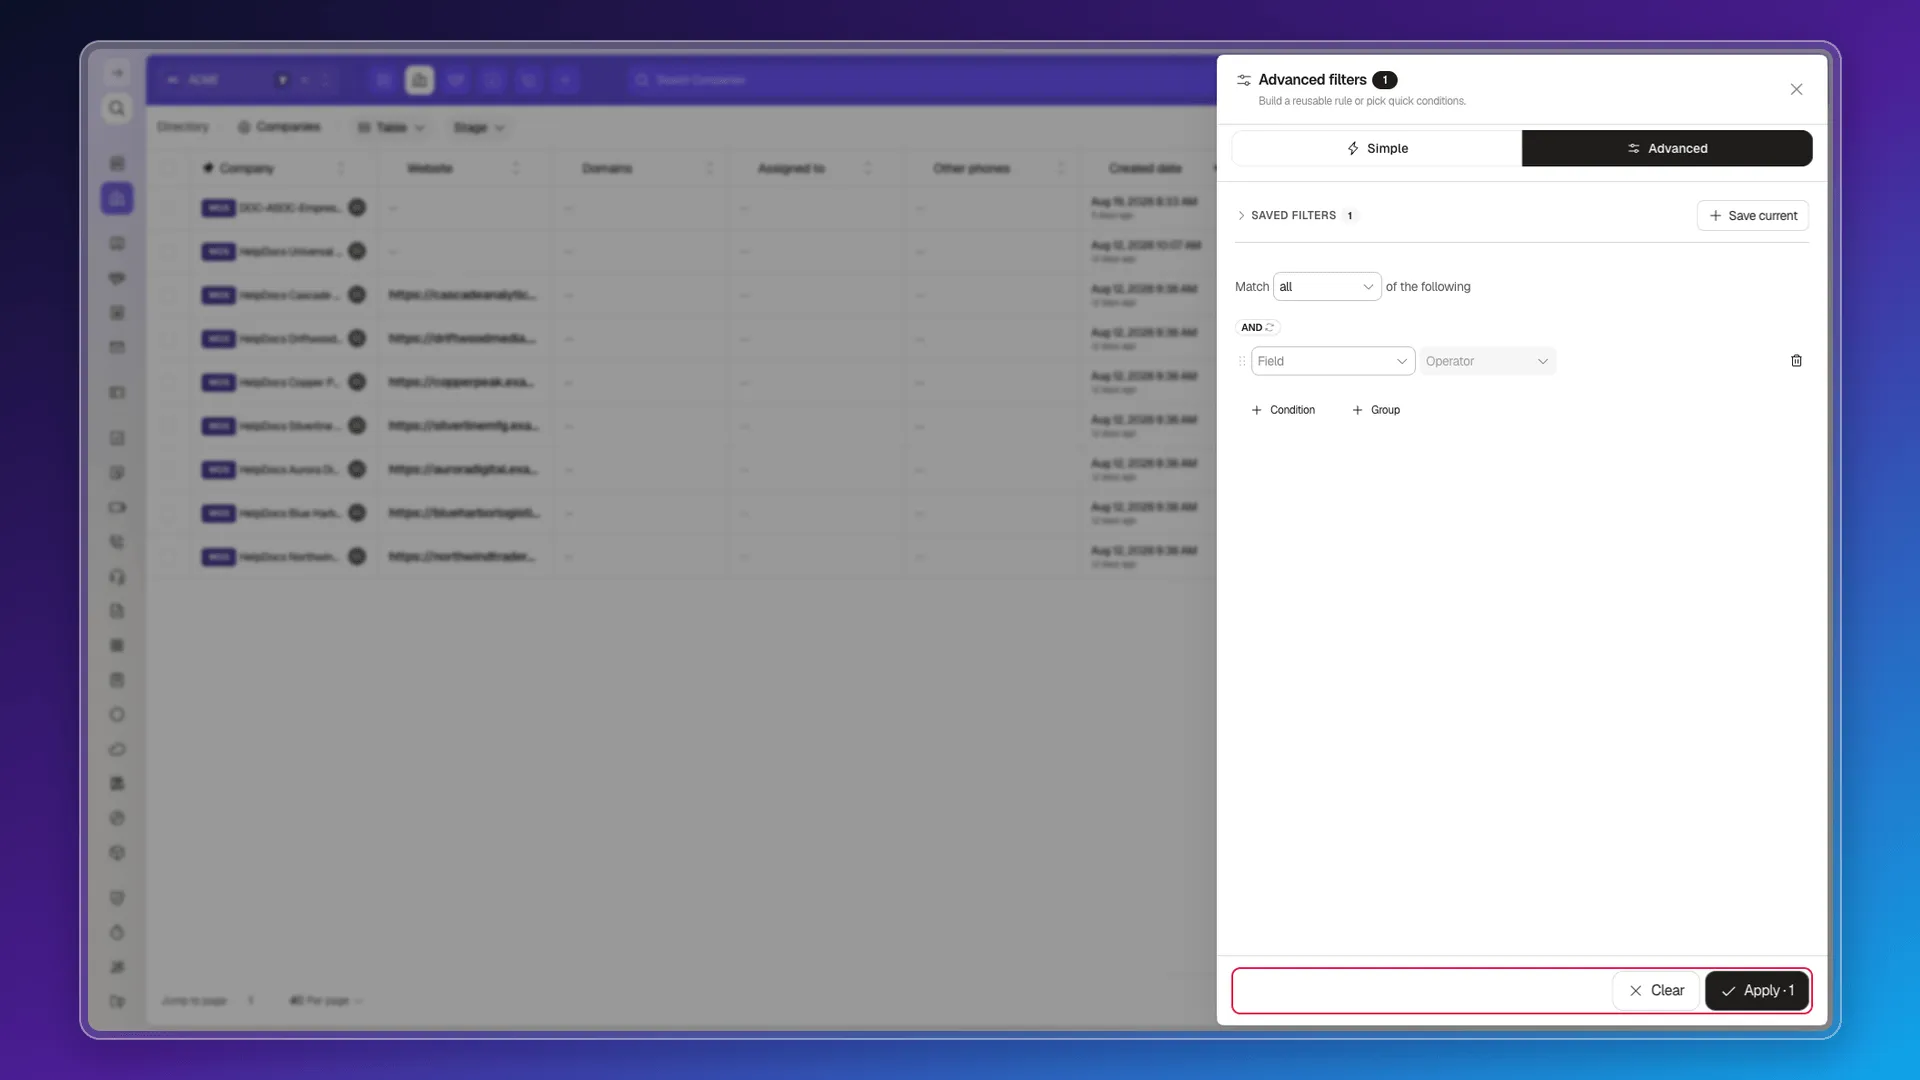
Apply confirms the current rule against the table; Close just closes the panel without adding anything new. To see the full table again, open Filters, select Clear, and apply with no conditions.
Save and reuse filters
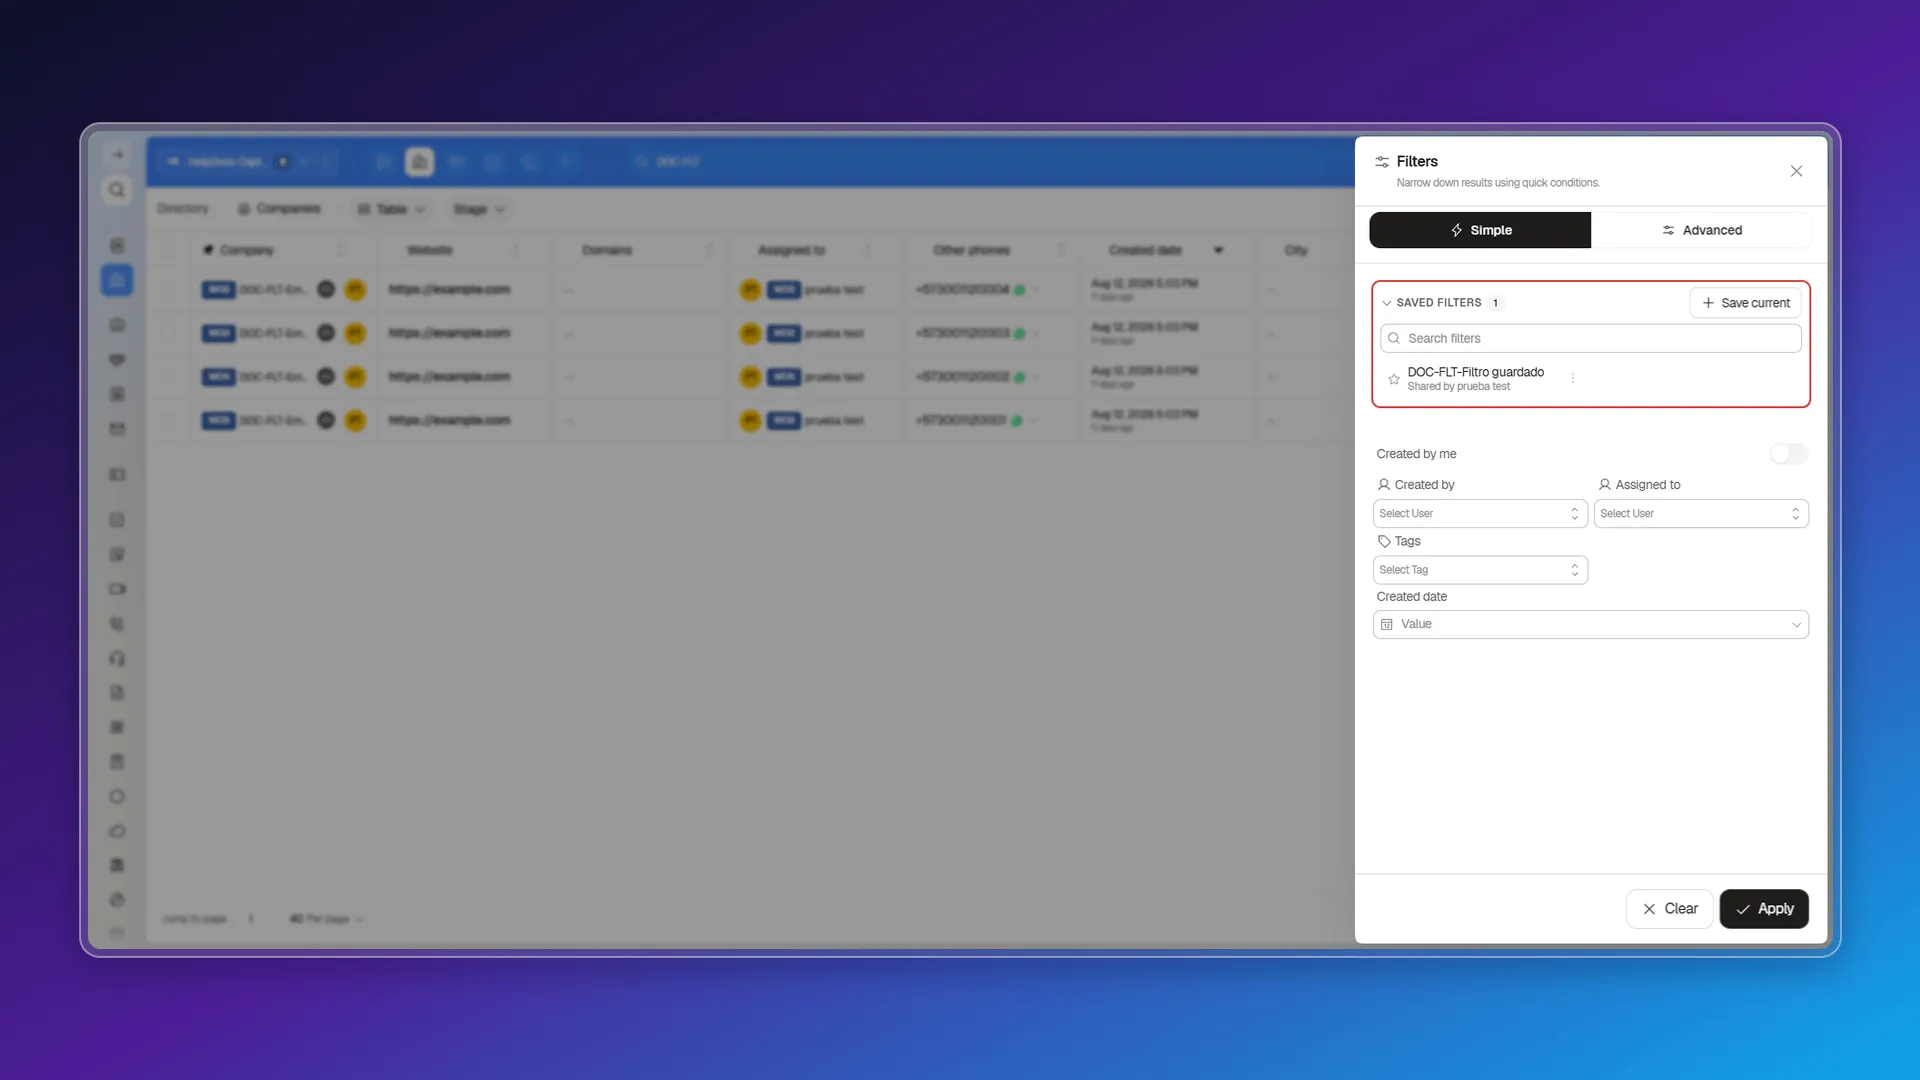
Section titled “Save and reuse filters”Save current and Saved filters live at the top of the panel: any combination you put together gets saved under a name and stays ready to reapply later. The account doesn’t ship with any default filters, so the list starts empty until you save your first one.
Each saved filter shows its name and who shares it. Beside it sit two controls:
- The star marks it as a favorite, so it’s quicker to spot once the list grows.
- Selecting the name applies it to the table straight away.
Once you have several, the Search filters box above the list narrows them by name.
What you can do with a saved filter
Section titled “What you can do with a saved filter”The three-dot menu (⋮) on its row opens five options: Apply loads its conditions onto the table, Rename turns the row into a text field, Duplicate makes a copy with the (copy) suffix, Overwrite with current replaces what was saved with whatever is applied at that moment, and Delete removes it from the list.
Each one, with its warnings, is in Saved filters.
If the table does not change as expected
Section titled “If the table does not change as expected”First, check that you actually selected Apply after editing — it’s the most common miss. Then check whether Match landed on all or any, because that one choice completely changes which records qualify. And if you just want everything back, Clear and applying with no conditions returns the full table.
🎥 Video coming soon.
Frequently asked questions
Yes. The panel shows the fields available in the table you have open.
Yes. Add the available conditions from the filters panel to narrow the table.
Was this article helpful?
Thanks for your feedback!