
Create and customize lifecycle stages
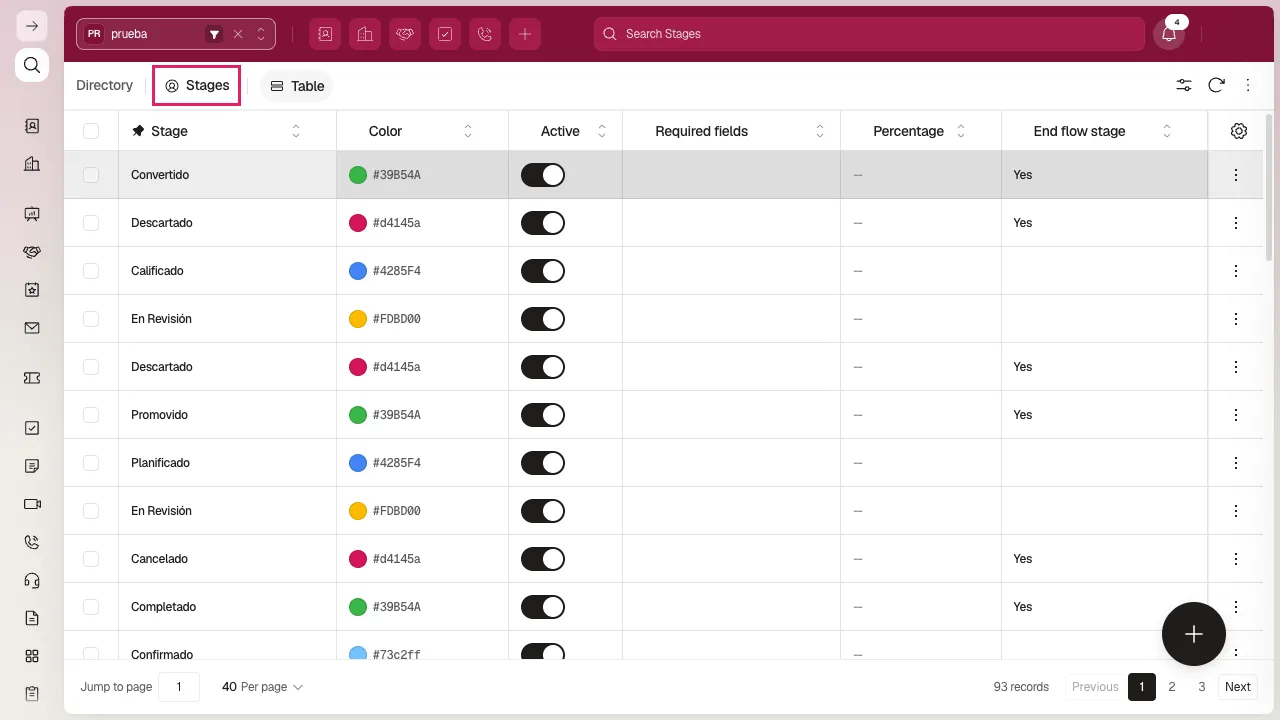
The options you see in a contact’s Stage selector — To Contact, Contacted, Client, and so on — aren’t configured inside the Contacts module. They live under System → Stages. That table is shared across the whole account: it holds the stages for Contacts alongside Deals, Work Orders, and any other stage-type field, so you’ll see far more rows than what your Contact selector actually uses.
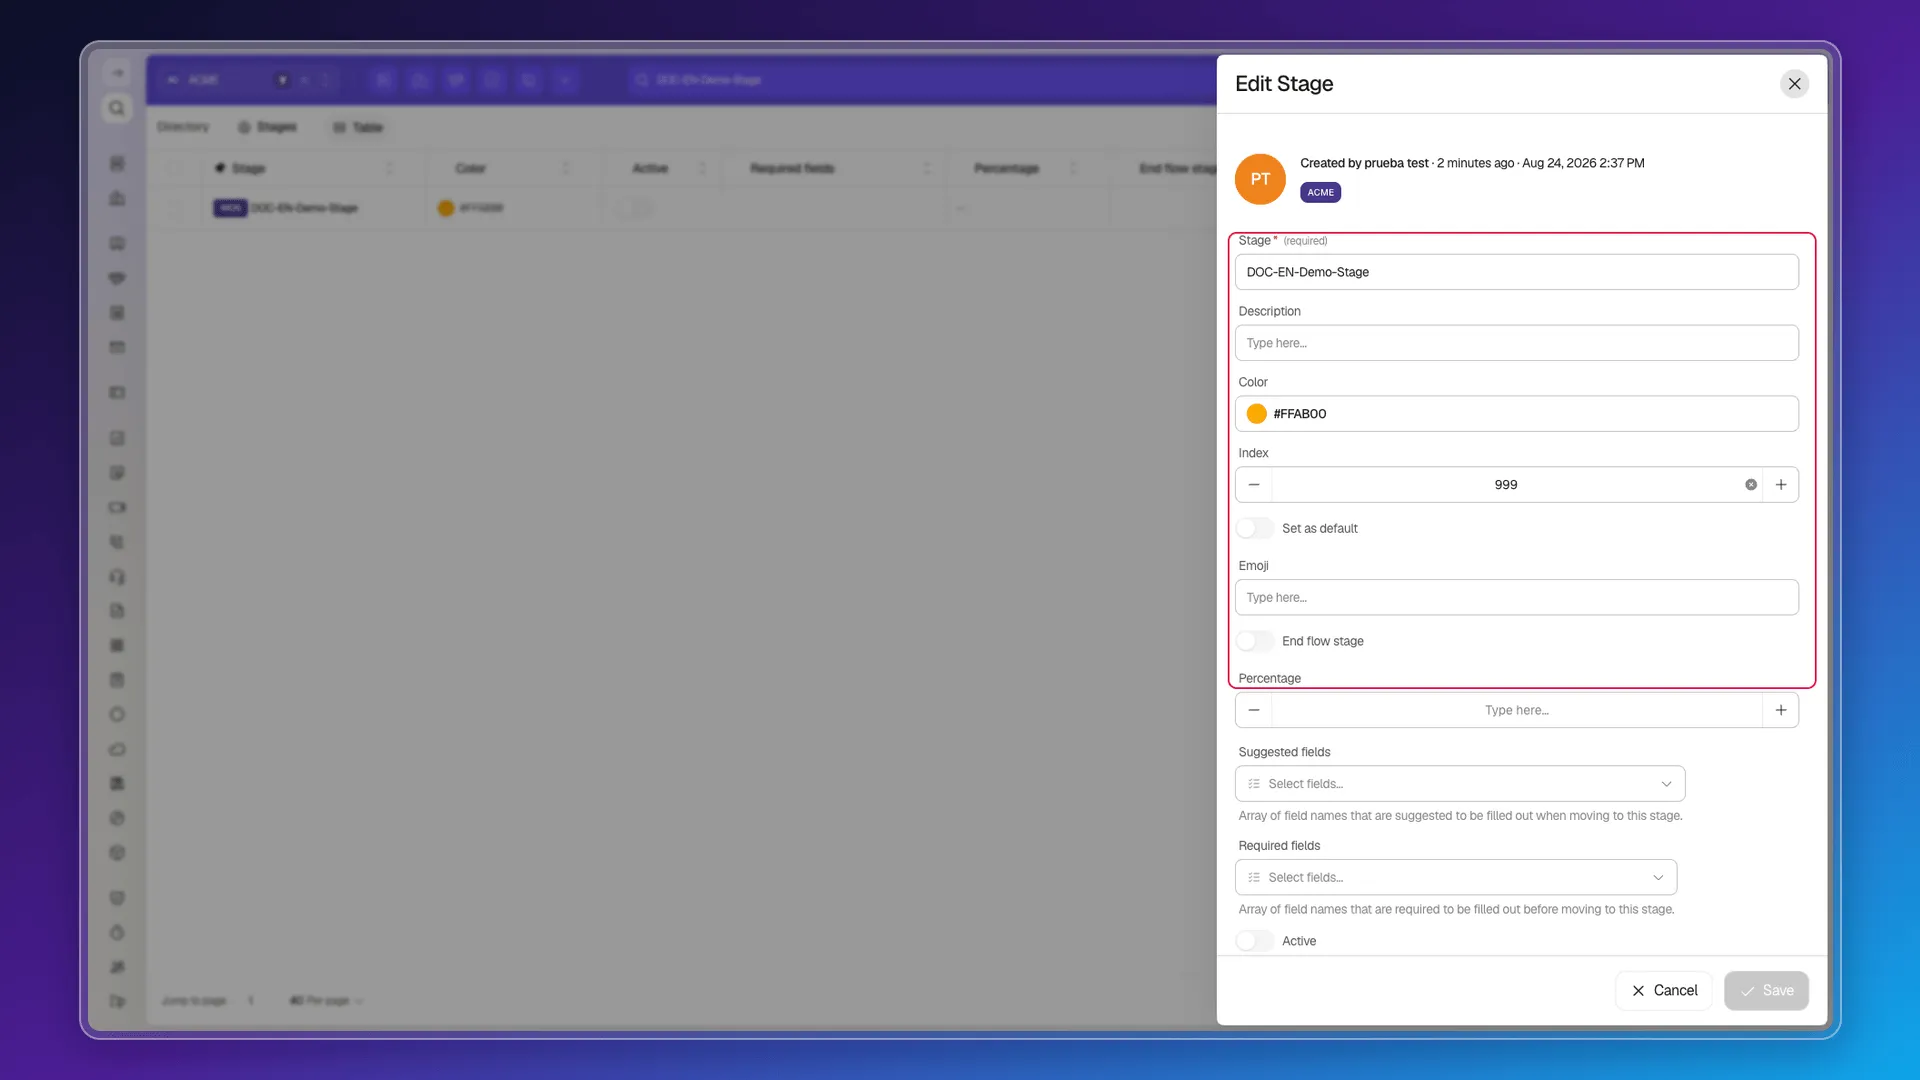
Editing a stage lets you adjust:
- Color and Emoji, to identify it in the board view and in the Stage filter chip.
- Index, which sets its order inside the selector.
- Set as default, so new contacts start on that stage.
- End flow stage, which marks it as a pipeline close (for example, Client or Lost).
- Percentage, a numeric value that goes with the stage and serves to weight its progress within the flow.
- Suggested fields and Required fields: two field-name lists. The required one lists the fields that must be filled before a record can move into that stage.
- Active, to pull it out of the selector without erasing the history of contacts that already carry it.
Creating and deleting a stage
Section titled “Creating and deleting a stage”There are two ways to create a stage, and both open the same Create Stage panel with these same fields: the floating + button in the bottom-right corner of this table, or the New stage button on the board.
Each row’s three-dot menu offers Edit and Delete.
To restrict who can edit a record based on its stage — not just which fields it requires — see Object pipeline rules.
Frequently asked questions
Yes, the three-dot menu on its row under System → Stages offers Delete. But the table is shared across the whole account, so the stage may be in use by other objects; to retire one that's in use, switching off its Active toggle is safer.
Under System → Stages. It's a shared table for the whole account, not exclusive to Contacts.
Yes, each stage has a Required fields property listing the field names that must be filled before moving a record into that stage.
Was this article helpful?
Thanks for your feedback!